
Beggars couldn't be choosers.....
In the mid-1960s, modellers were not exactly spoiled for choice if ready-to-run was their interest. Little accurate general GWR rolling stock was available and for that company's coaches you could pretty much forget it. In 1961 Triang introduced their now famous r-t-r GWR Clerestory coaches , but they were not properly liveried and by any standards they were quite primitive with non-glazed windows, no interior detail and open axle boxes. So, 'build it' was pretty much the order of the day if you wanted variety.
At around this time, N&C Keyser were producing simple white metal kits of locomotives and rolling stock for various railway companies. Designed to be glued or low-melt soldered, they were popular for a while and can be seen on layouts in many old back-numbers of Model Railway Constructor or Railway Modeller. For the GWR, they produced a number of coach models including 4 and 6 wheelers and a bogie luggage van. Although production must have ceased at least 30 years ago, these can still be found for sale at shows and on eBay and they have a certain charm. K's kits also have the undeniable benefit of not being available in any other easy-to-build format, which is why they re-caught my interest. The photo below shows one of the last K's GWR kits to be released, a plastic 6 wheel Low Siphon. A simple kit which can be made up into an interesting model, and one which still appears regularly on eBay. These Siphons went through three stages of release: all metal, metal and plastic and finally all-plastic. I de-flanged the centre axle to enable the model to run through curves.
[Click on all photos to enlarge them]

And today ?
Well, look for r-t-r or easy build GWR 4 wheel coaches right now and what would you find ? The ubiquitous Ratio kits and the rather toy-like Hornby offerings. There's certainly nothing wrong with the Ratio kits at all [apart from a lot of moulding flash - they're really showing their age now] and there are plenty who like the Hornby shorties too, but not me. Not at all. Nope.
I've been looking for K's alternatives for a while now: I've bid online for many but, until the other day, have always been trumped. I recently picked up two 4 wheel Thirds quite cheaply however, still shrink-wrapped onto their cards, and they will be the subject of this article. They hammered at £20 including postage: quite reasonable.
The castings are very clean for Keyser models and so they are probably quite early releases. They are also very simple, just sides, wheels, a roof and some buffers. Easy enough to make, although a great deal of manipulation will be necessary to ensure that the larger castings are completely flat along all planes: both roofs are twisted along two planes and this will be difficult to rectify. With care, and some filler, they will make up into interesting and quite different coaches. Ideal for a quiet branch, or just an occasional outing on one of the Club's large test tracks..........
The photo below shows a set of castings 'out of the box':

That's the entire kit: pretty basic stuff. The lump in the bottom right hand corner is, I think, a brake vacuum reservoir. It's too crude to use and will provide ballast in another model at some time. You'll note that there is no floor........
It's worth observing here that Keyser castings are not light. Each coach weighs in at just under 8ozs, and that's without a floor, glazing and interior fittings. It is essential that they are constructed to be as free-running as possible. The two alone will weigh over a pound and as I plan to acquire a Keyser 6 wheel Family Saloon and their bogie Full Brake in due course also, something with some real grunt is going to be required to pull them.
Construction
Work started with pretty much the usual stuff: clean up the castings, manipulate them into as straight and square a state as possible [an engineer's steel rule was invaluable here], file away some moulding bulges, think about solutions, etc..
No real difficulties were envisaged but some Collie-related damage would have to be rectified at some time. The dog had attacked the post and bitten through an end piece completely. The photo shows the damage after some initial bending and reshaping. A rear reinforcement with Araldite epoxy and some filler on the front face will deal with the rest of the damage in due course.


Using a sheet of glass and some Squares to ensure the straightest fit possible, I initially tacked the ends and bodies together with small drops of superglue to test the fit. That showed what I had suspected: bows, irregular castings and gaps, but none I felt which could not later be managed by filler and gentle bending. It also demonstrated that in this case, sheet glass and Squares were completely redundant and a better job would be done by eye. For this reason, I would always prefer to glue these kits together rather than use a low-melt solder. Manipulation after fixing will always be required and the slower-setting epoxy allows for what solder would not.
Photo below shows tacked fit and also the method of location - moulded lugs on the end and side castings. These needed a lot of filing to square-up and ensure a good fit. Even so, a gap was left on the outer side which will need filling later. A moulding lug near the V-hanger will need cutting off also.
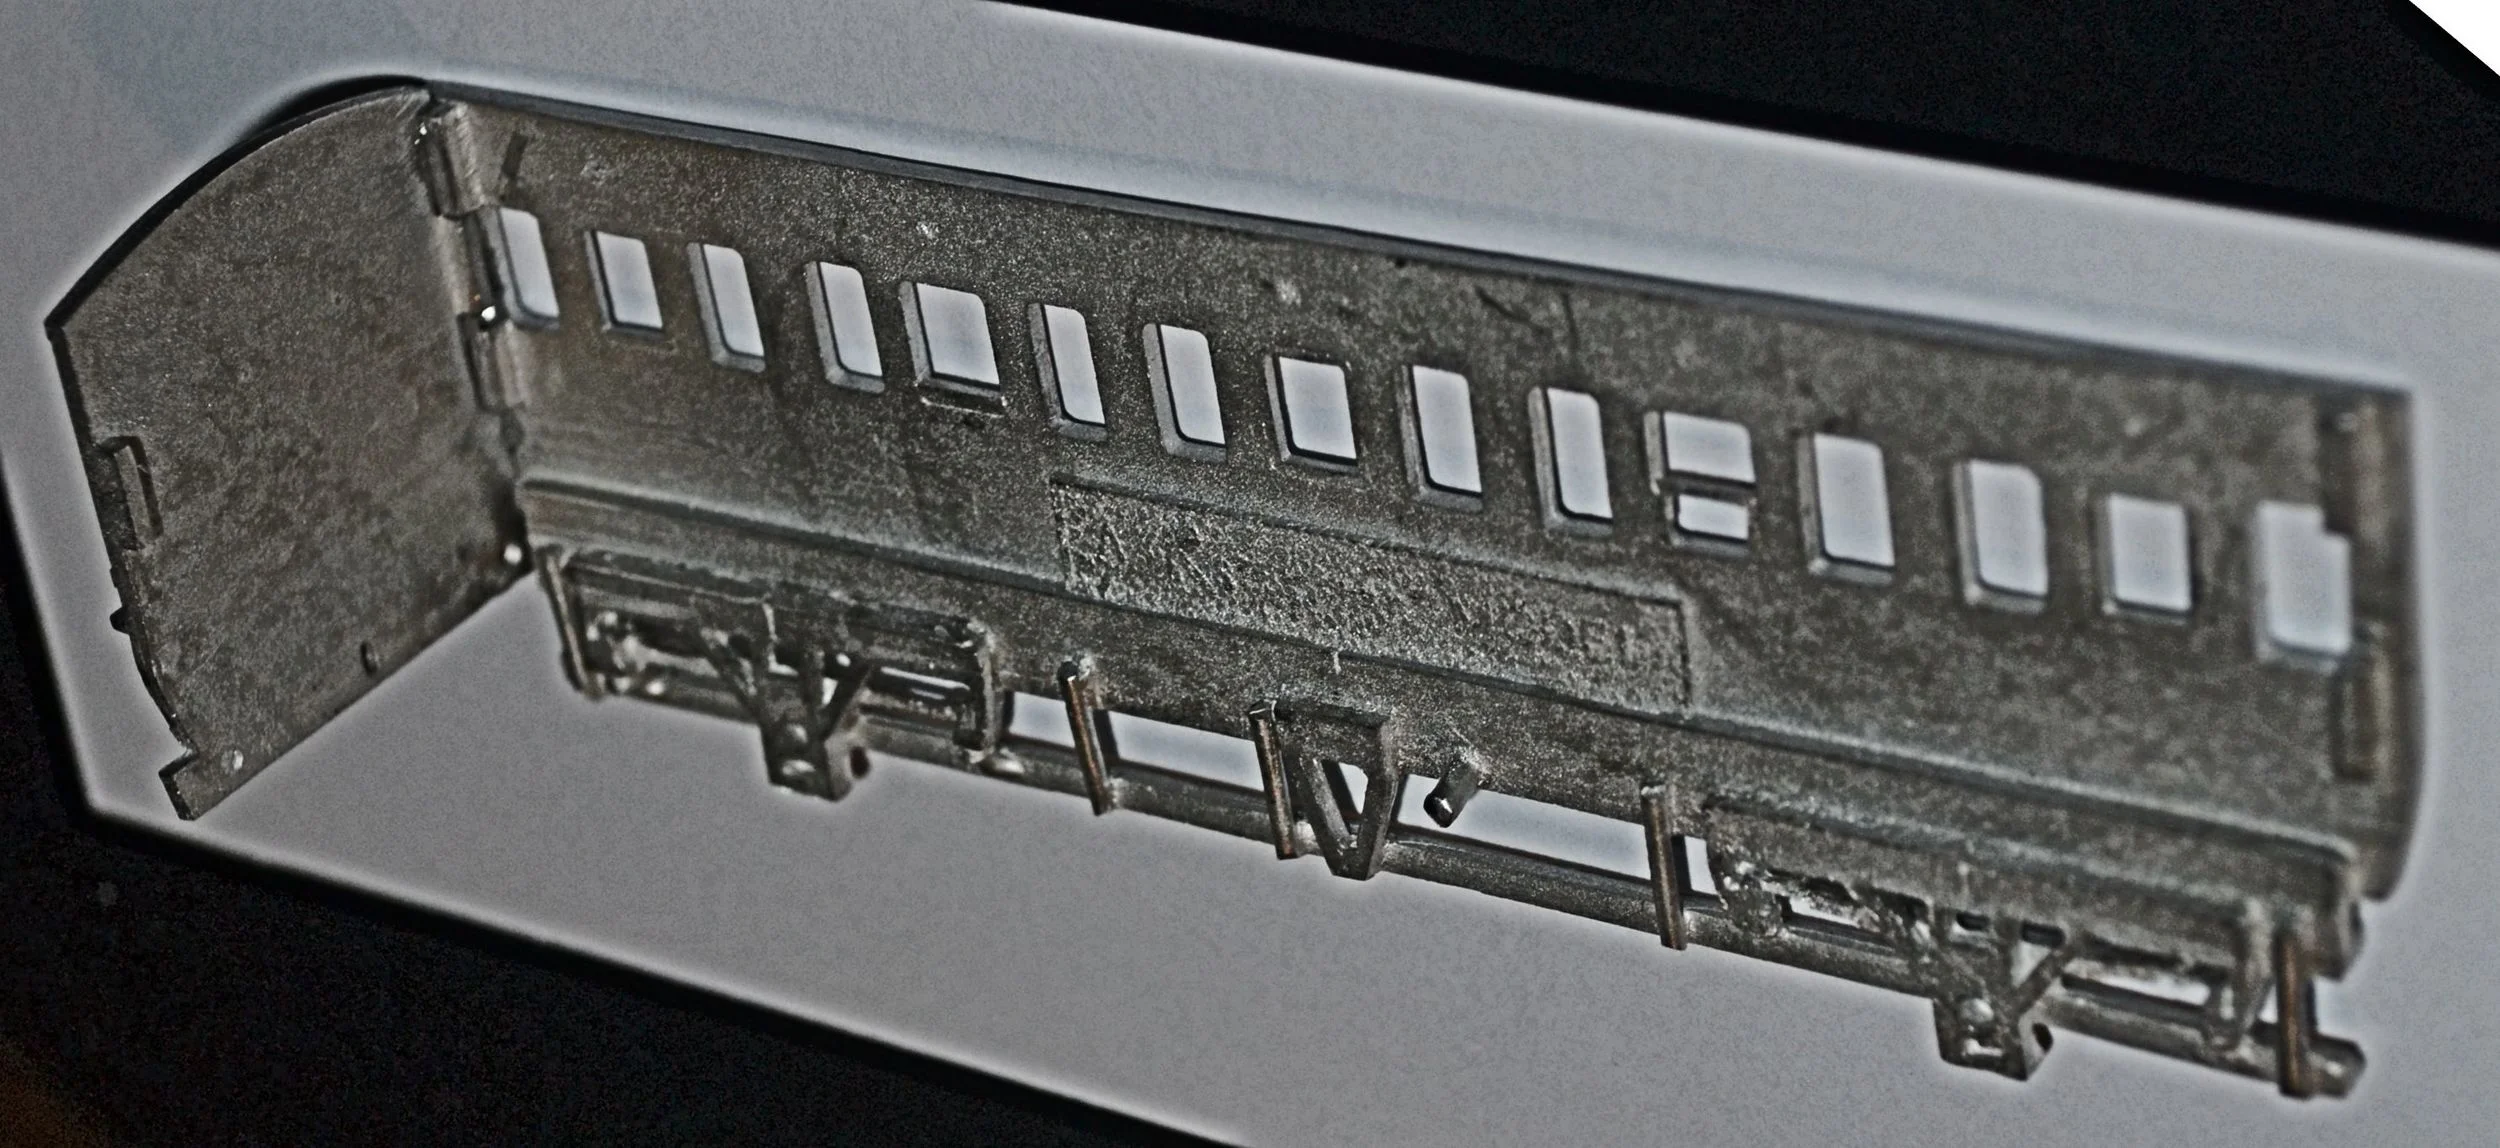
Of greater concern than the above however were the axle holes. The wheels supplied had axles which were far too long to fit, even if the boxes were splayed ludicrously. The wheels that I intended to fit had shorter axles but they were still too long. The only solution would be careful drilling and filing: drilling out the axle boxes as far as I dared [I went clean through one] and filing down the ends of the brass top-hat bearings as far as they could go. Eventually I managed to sink the bearings right into the castings and the new wheel sets would at least spin. A little tuning and they spun really freely but - horrors - I could not get more than three wheels [and sometimes not quite three !] to sit on the rails at the same time. It took two hours to get each axle level but even then, one axle was higher than the other, so the body dropped towards one end.
There was only one solution: because opening up oval holes to adjust the bearings at one end would be too irreversibly hit-and-miss, I simply put a bigger wheel set at the higher end to even things up. An appalling cheat and it will irritate me for ever, but it worked. And it's not that noticeable on the track either.
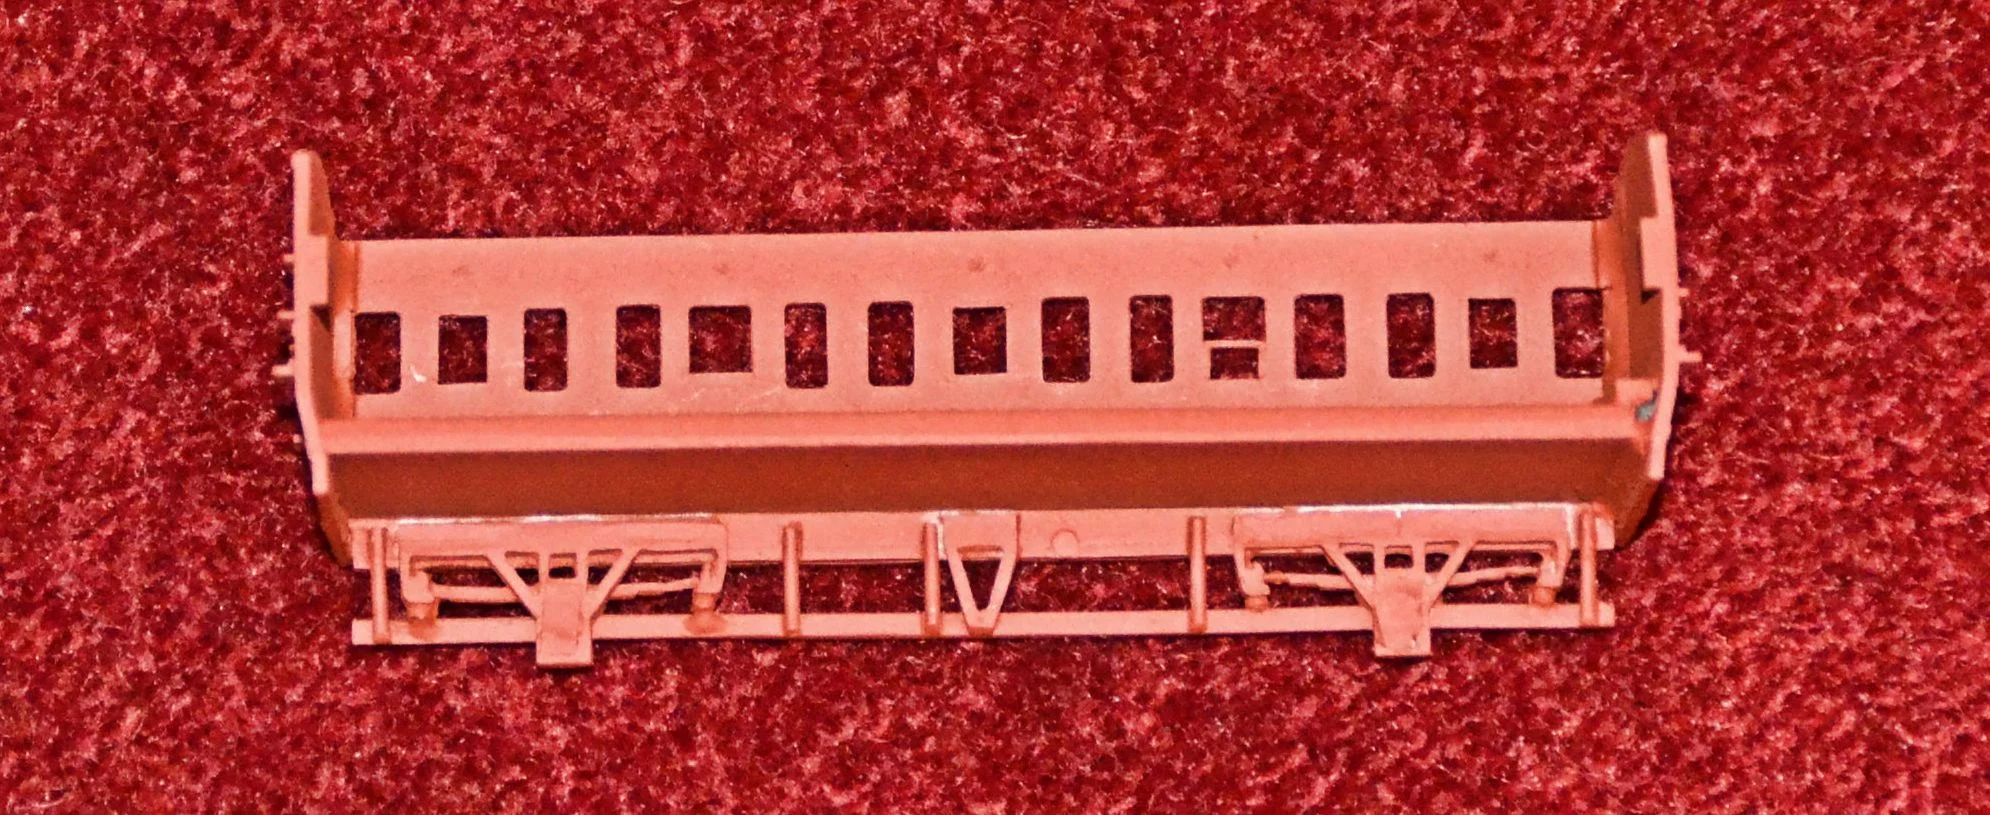
Photo shows the body in primer [before and after the final side has been attached] and the floor fitted [it's made from a type of foam-board: very light but very strong]. Far from being cosmetic, the floor has great structural importance, it's just about the only thing that holds the body together. That, and about half a tube of Araldite.......


What I now know is that different solutions will have to be found for each one of these that I build: they are nowhere near the standards of modern injection-moulding. It'll be two, and no more........
Cosmetic additions and some making good........
Filler [Milliput two-part epoxy filler] ]has now been applied to seal some gaps in the joints at each end of the coach. Cosmetic tie rods [brass wire] have also been attached to each axle box bottom and dummy brake vacuum gear [from the bits box] fitted in between solebars. This little bit of detail improves the lower outline considerably. Nothing else will be fitted between the solebars as it cannot be seen easily.

Vacuum pipes have also been constructed for the coach ends and emergency brake rodding applied to one end. I'm not at all sure that these coaches were so equipped [rodding] as I have not been able to find any convincing photographs to confirm this. The rodding adds detail to a rather stark end however and looks good for that. Cosmetic couplings have also been applied and the original wheelsets changed: both axles now have a similar profile and are closer in size. The coach runs evenly and freely.

A further coat of primer was applied after the buffers had been fitted. The next job will involve spraying the sides with GWR Brown [Halfords Vauxhall Brazil Brown - an acceptable match when varnished] and then masking off to spray the footboards, chassis and ends Matt Black.


Intermission.........
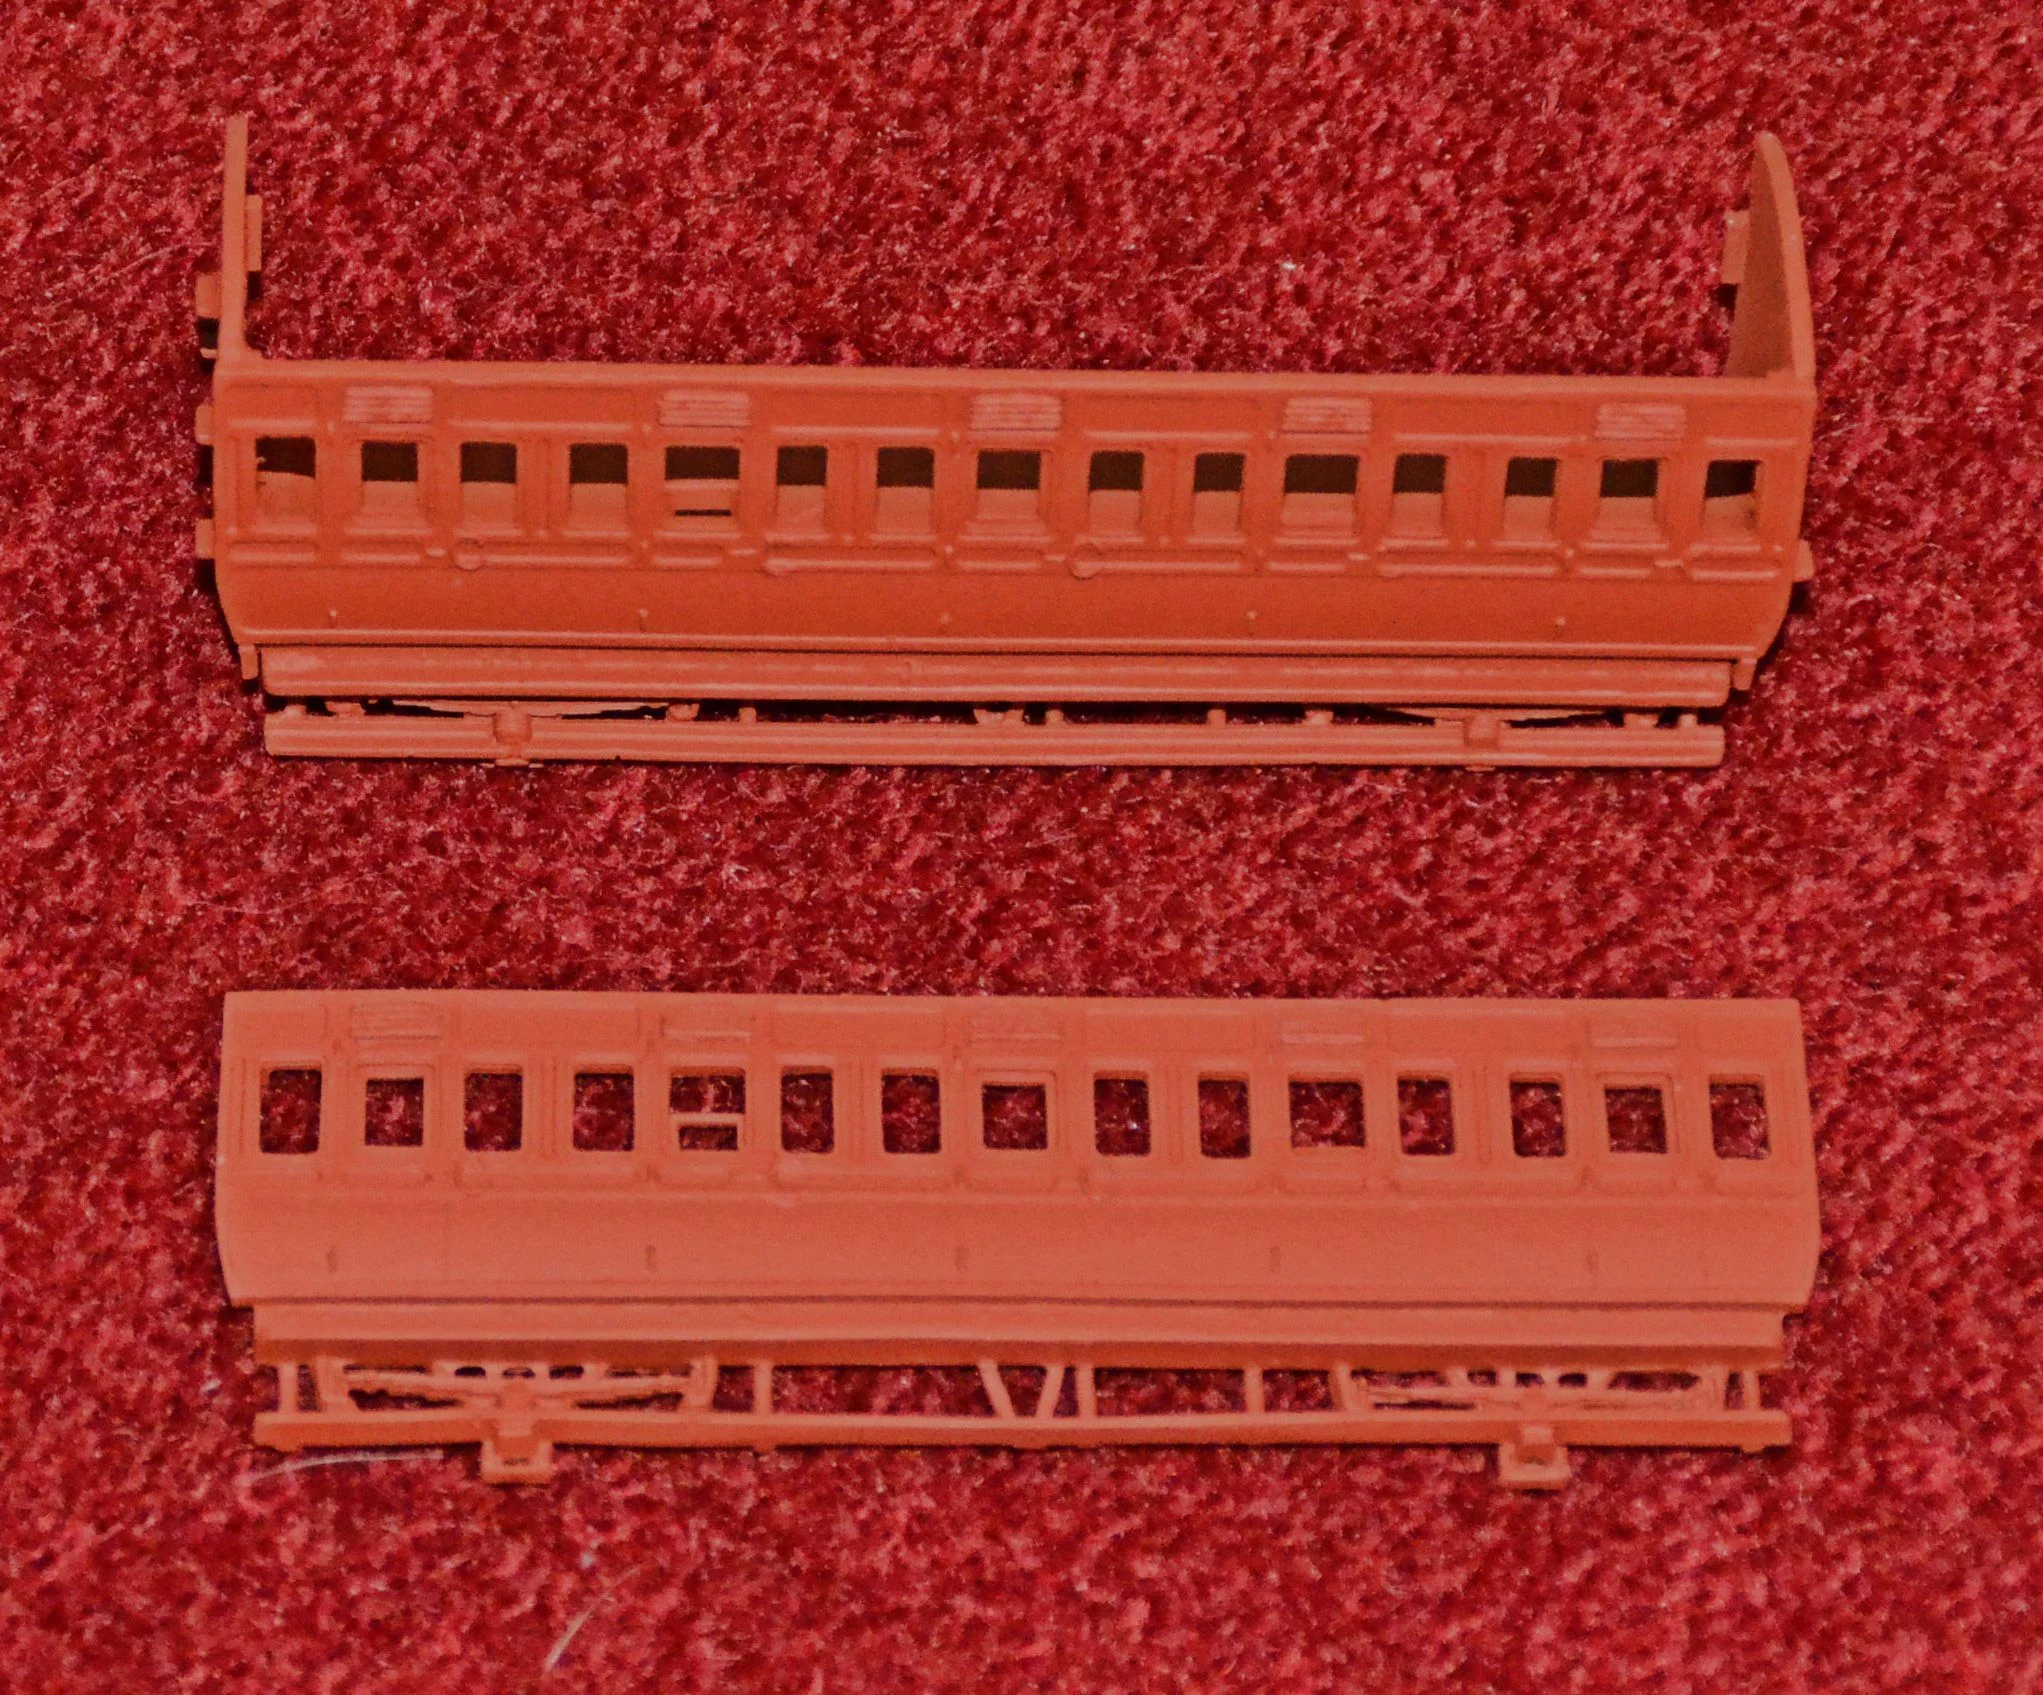
More-or-less in parallel with this build I am constructing the second of the four-wheeler kits. Superficially identical only, as noted earlier, it has presented its own set of problems:
- the sides are of differing lengths - not vastly so, only a couple of mm., but sufficiently so for the axles, when inserted, not to be parallel themselves
- the holes in the axle boxes are asymmetrical and are out across two planes: height and length, resulting in a completely twisted wheelbase
The problem of the former is completely negated by the latter, but both will require attention in due course. As things stand, the coach derails the instant it is placed on the track. I'm anticipating a couple of hours with a drill, some files, different types of bearings and some super-glue before things are resolved.......
Oh, I managed to drop the model also after fixing the floor to a side and the two ends. More straightening out is required.
Meanwhile, back at the shed.............
A short update. Construction on coach two has now been finished and it runs freely, the axle box problems having eventually been rectified. I now have two sufficiently free-running coaches to proceed to painting and lettering.
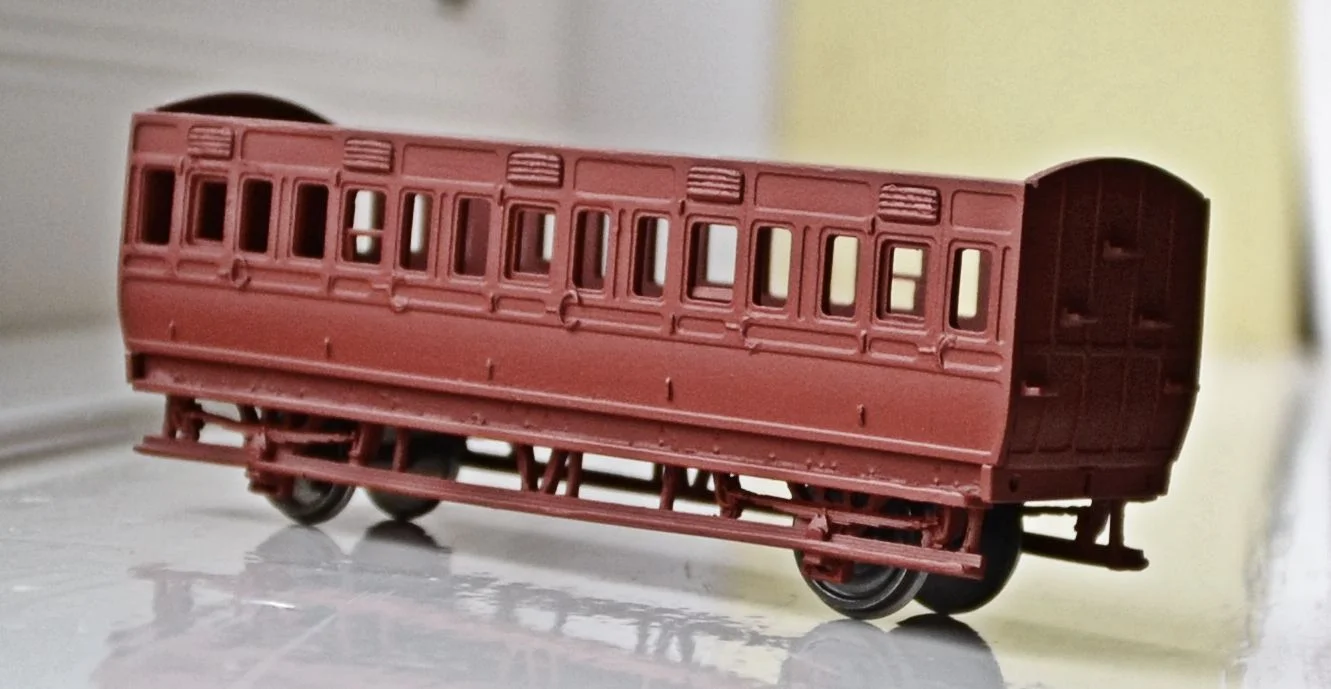
Coach one has had an overall coat of chocolate applied and then a coat of cream to the upper panels of one side: a little tidying is required but, overall, I'm happy with the result. The ends and underframe have been sprayed matt black and the buffers and vacuum pipes detailed. Coach two is in primer, awaiting its overall coat of chocolate.
Coach one is shown below.
This is a pre-tidying shot and poor lighting does not show the finish to best effect. As ever, digital cameras take no prisoners but the finish is better in reality. A coat of satin varnish will level out any imperfections once the lettering has applied. It's marvellous for 'standardising' the finish.
End game......
Some general tidying up followed and the coach was then lettered and varnished. Glazing was added together with compartment partitions and the wheels carefully sprung back into place. With considerable relief, because of the substantial handling that the body had had during the above operations, I found that all four wheels sat squarely on the track and the coach was able to run through tight curves and points with ease.
Finally, the roof was attached. I used Evo-stik Rapid two-part for this: it glued tight and hard and also filled some remaining small seams and gaps. Couplings were the last item to add and the coach is now complete, awaiting its pair 4-wheeler, before being joined by a 6-wheel Clerestory Tri-Composite.


As the above account shows, this is not a quick build but it is not a difficult one either. Overall, I'm really pleased with the outcome and as long as kits with complete and undamaged castings can be sourced, a good result should follow. No 16 is destined to become one of a rake of seven coaches: an improved Tri-ang Clerestory 3rd. Brake Third, two K's whitemetal 4-wheel Thirds, a Ratio 4-wheel Third, a K's white-metal Clerestory Tri-Compo, a 6-wheel Clerestory Brake Compo [made from a Tri-ang Clerestory Brake Third with a scratch-built chassis] and a 4-wheel PVB [made from two Tri-ang Clerestory Brake thirds]. Build details will appear elsewhere within this web site.