- A Letter from America -
by Tony Richards

A magnificent OO kit-built Ocean Mails van, constructed by David Lawrence and painted by Larry Goddard.
Towards the end of 1926, the Great Western Railway built six new 57 ' bow-ended passenger brake vans to GWR Diagram K38. Originally painted in the standard livery of the time, they were fairly quickly re-branded 'Ocean Mails' to run in the 'Ocean' special trains which met trans-Atlantic liners berthing at Plymouth. These trains were extremely luxurious, using the GWR's 'Super Saloons' [superior to other railways' 'Pullman' stock] and were high profile services designed to impress.
This latest project will involve building of a GWR Dia. K38 Ocean Mails passenger brake van by significantly adapting a Hornby Railroad Collett Bk 3rd, attaching Comet etched brass sides and other fittings, and include various other improvements along the way. The livery will be for the final GWR period and, when complete, the vehicle will run with a rake of Hornby Hawksworth coaches and other Comet-adapted stock. Modelling these coaches is relatively straightforward although the level of complexity is in direct proportion to the amount of detail to be added. One of the problems faced by modellers attempting this build is a relative lack of photographs of the original however: few seemed to have been caught by photographers of the time and consequently, for the livery details at least, a certain amount of conjecture may be necessary.
This photograph shows the donor coach as the starting point [it has already been dismantled]:
The next two photographs show a] what immediately required removal before any other work could commence [the awful Hornby ventilator mouldings and the water tank and all of the raised detail from the sides] and b] that part of the roof after they had been removed. The ventilators were easy enough to cut away and did not, in this case, require replacing: the van had none fitted. The water tank was another matter altogether though, not least because it formed part of the roof ribbing at that end. It was eventually cut away in slices by using a razor saw placed flat on the top of the coach and gently sawing along the length of the roof. Some fine wet and dry emery paper helped finish it off after a flash of primer indicated any ridges or gouges that required attention

The three destination board brackets on each side of the coach [see the donor coach body above] will need cutting away also. The roof ribs will be left as they are; they are not accurate for the planned coach and should be replaced, but achieving a consistently neat, even finish may just be a bridge too far. At this time, the solid roof handrail mouldings have also been removed. They will be replaced correctly, with wire, to stand proud of the roof in another position.
For those who are unacquainted with Comet etched brass sides, this is what they are all about:
In this case, the drop lights are, happily, already part of the etch and so do not require attaching. The tumble-home has also been neatly pre-rolled and it fits the donor coach sides beautifully. All that will be required to prepare the sides for attachment is cleaning up the small etch tabs with a file [you might just be able to see them on one of the etches, the other has been dealt with] and preparing the donor coach for the attachment. This latter task is done by marking out where the windows on the etch will fall and then cutting away the plastic from the body which will lie immediately behind. It is important to always remove sufficient plastic to allow for perspex window inserts to be glued in from behind, this will ensure neat flush glazing and is the reason why the holes in the sides look so large. See below.
The photo above shows the body in an incomplete state: a few more window holes need to be cut away from this side and the other side hacked as well. It gives an idea of what has to be done however. There is no really easy way of doing this: simply mark out with a pencil where the cuts are to be made and then cut away with a sharp scalpel. It always looks a complete mess at this stage!
The last time I used Comet etched sides, I attached them and then painted them in situ. This time, to make the task of masking and handling far, far easier, I plan to paint and line them before attachment.
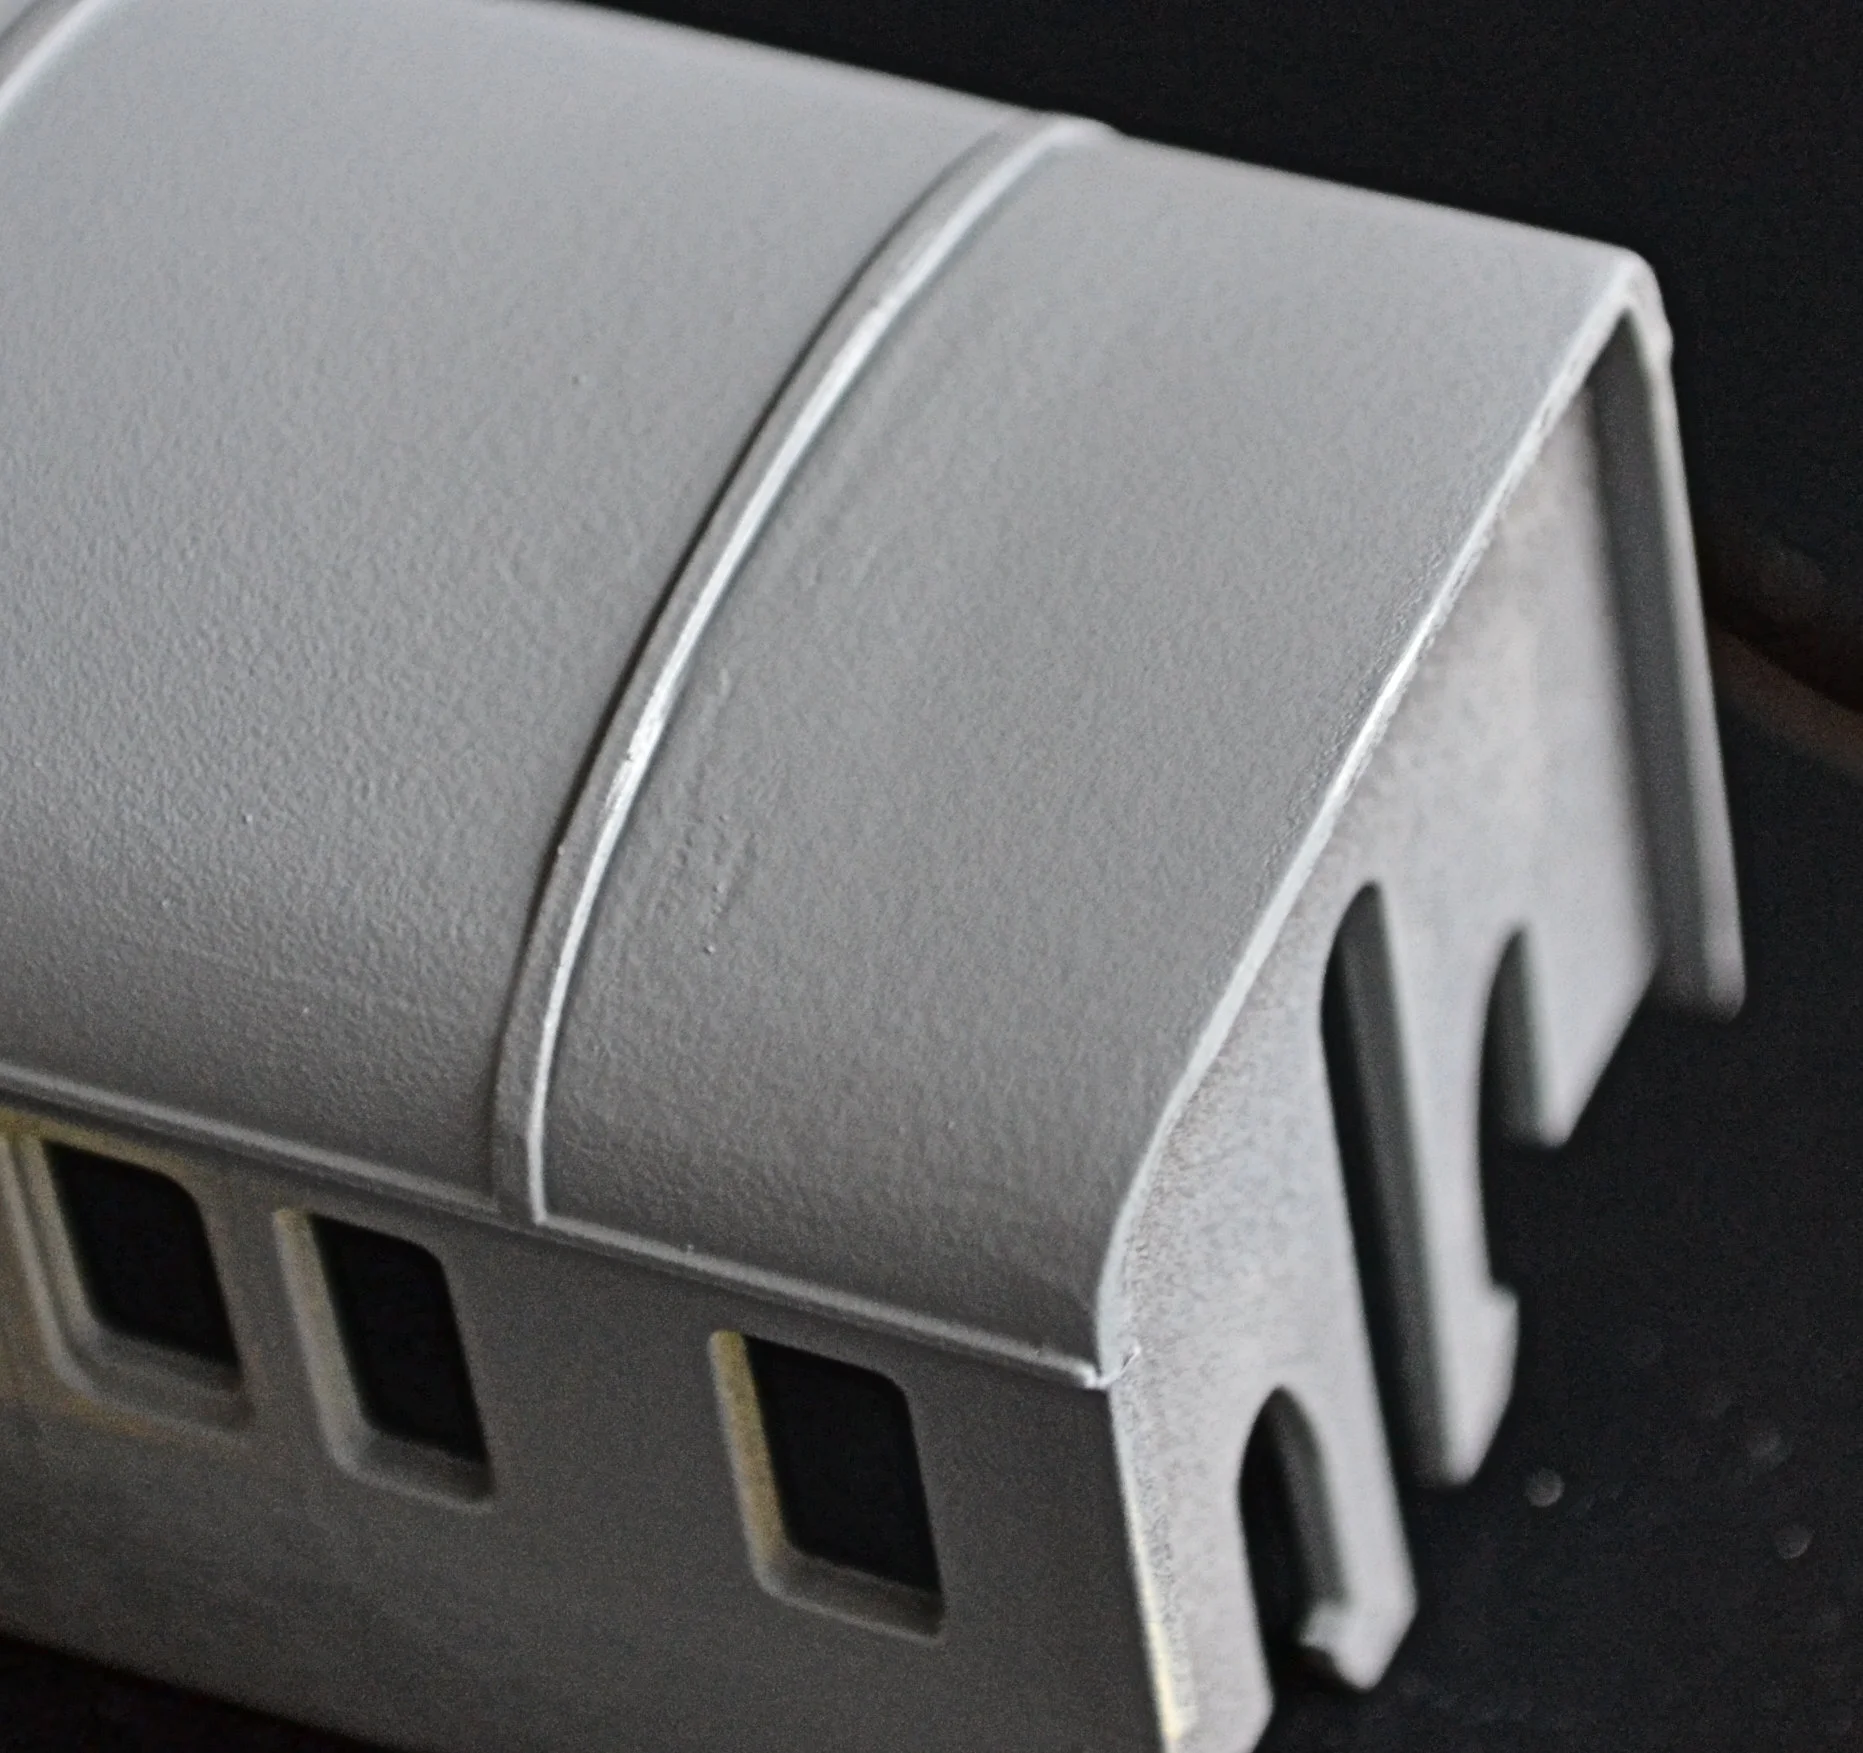
Having becoming increasingly dissatisfied with the incorrect roof ribbing modelled by Hornby, the inevitable happened. On the basis of nothing ventured, nothing gained, I threw caution to the winds and, with a new blade, started to slice them away. It took 20 minutes to remove the first one - and there are 7 more to go - so it'll not be a rush job. It looks as though it just might be possible however.
You can just faintly make out the outline of the removed rib above the centre line of the doors, mostly because the plastic now has a different texture. A little more sanding and it'll be gone, and then just seven more to do !
The next photograph shows all of the roof ribs removed, the roof carefully sanded to remove any residual ridges and then given a flash of primer. I'm really pleased with the result, it's really flat and I only wish that I'd done this when I was building my Dining Car earlier. Not a quick job by any means, but nowhere near as difficult as I had anticipated.
The ribs will be reinstated in their correct position [and number 5 instead of 8] later. Checking the drawings I also noticed that they are not symmetrical, their spacings differ. Micro-strip will be used to simulate them
The next photograph shows the roof adaptation now complete with new ribbing, grab-rails and destination-board holders fitted in their correct positions.
Attaching the ribs was difficult and I had to resort to superglue to keep the ends in place, the problem being the sharp increase in the radius at those points and the very short length of plastic rod to be glued down. Hopefully they will stay in place.
It always looks a bit messy at this stage: some primer, followed by matt black, will work wonders. It's worth comparing the 'before and after' to show that the insane amount of work involved was worth it.
At this point, I'm unable to start painting the brass overlays as I must get the correct shade of cream made up for me. There is plenty of detail work to attend to elsewhere however and I have made a start on the corridor gangways. I am keeping the original Hornby units but the moulded handrails and the awful gangway have had to go. Shaving off the handrails was easy enough but the gangways took more effort and care had to be taken not to damage the steps, which have to be retained.
The photos show a 'before and after', with the new gangway installed. Suspension units for the gangway will be folded up out of wire and new handrails formed in due course. Inevitably, because there was very little room to manoeuvre around the steps, some gouges occurred when removing the moulded gangways. These will be lost under matt black paint.


Incidentally, the replacement gangways are spare Dapol Centenary units. I had a bag full once and very useful they've been too. They are probably unobtainable [at a sensible price] now. When purchased, they were 10p each.
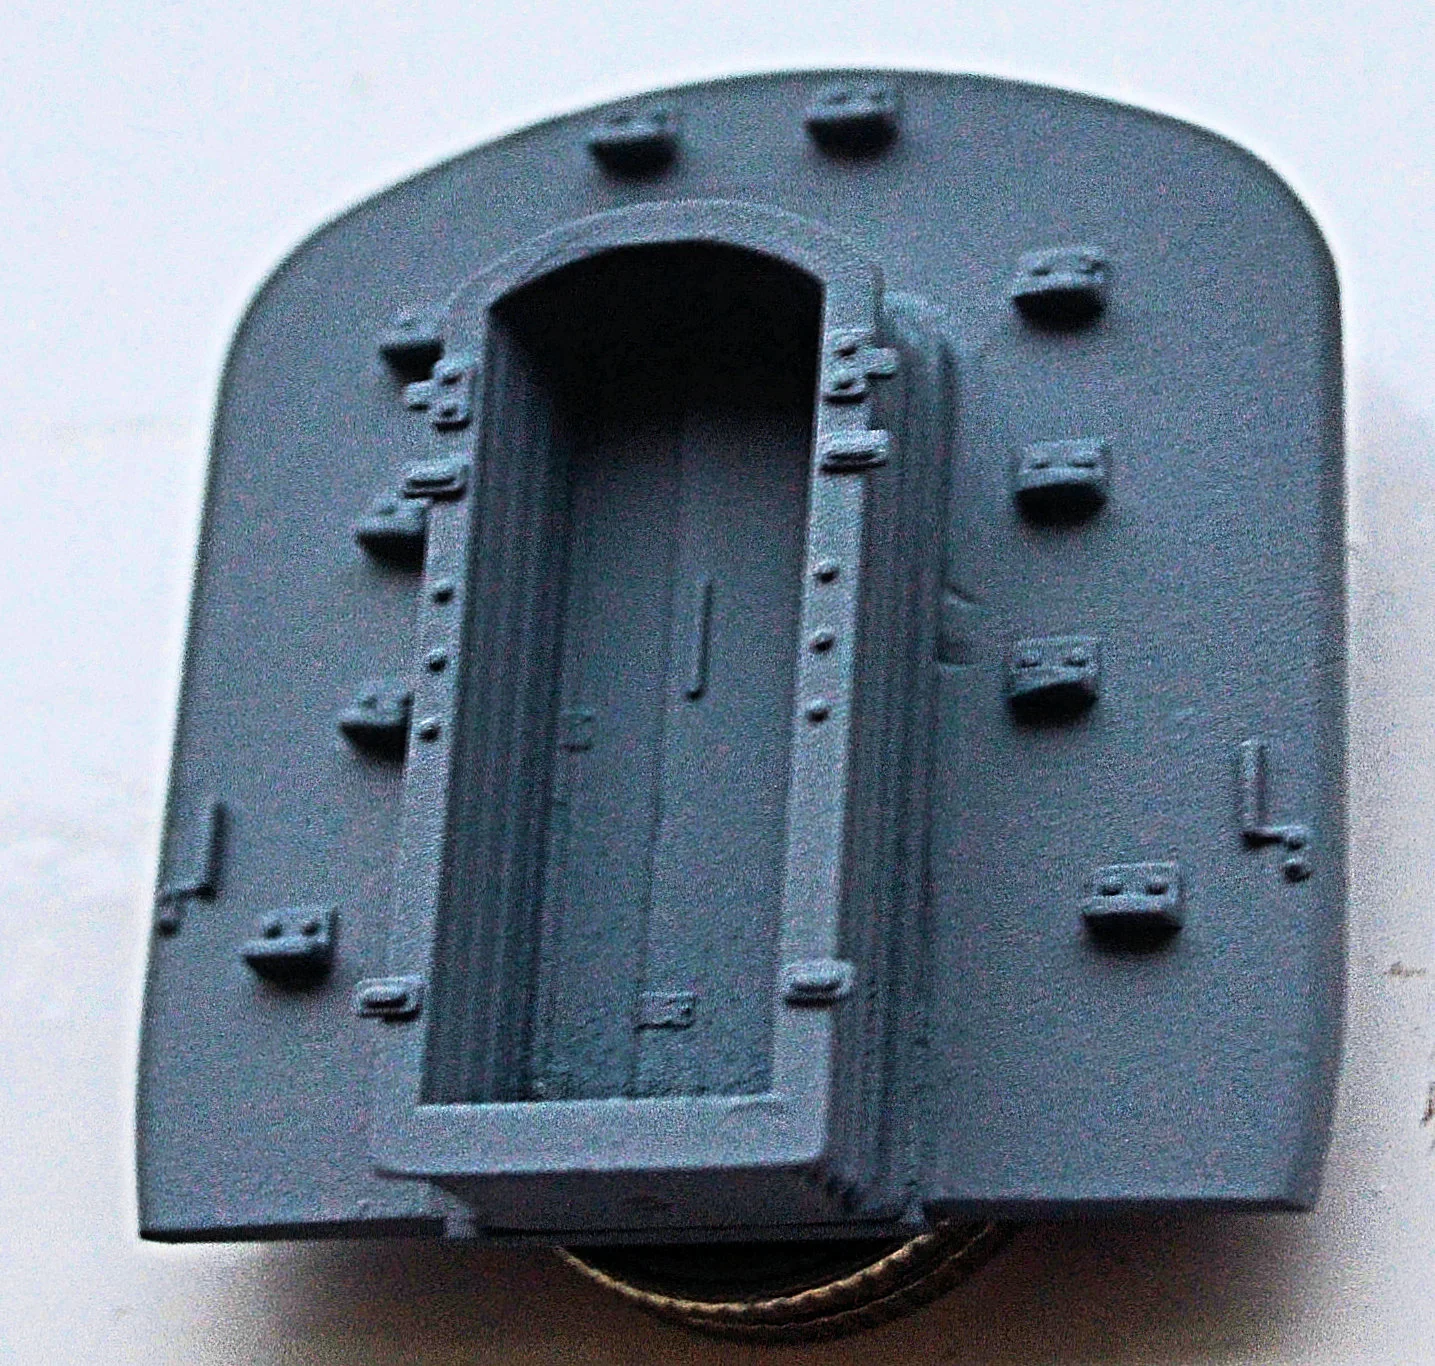
The coach ends with their attached gangways have been glued into position on the carcass. These are never a particularly tight fit on Hornby coaches however and their profile rarely matches that of the coach body. Consequently [and because of the way in which they are attached normally], the ends can move around slightly and gaps between them and the coach roof are generally evident.
This is unacceptable and the only solution is to glue the ends into place and then fill the gaps with Milliput. When cured, the filler can be sanded smooth and, if done properly, the gaps will disappear completely.
The photograph above, alongside, shows a comparison between the finished job and a typical unmodifed Hornby railroad-type coach. From that, you can see why time spent filling and sanding is essential.
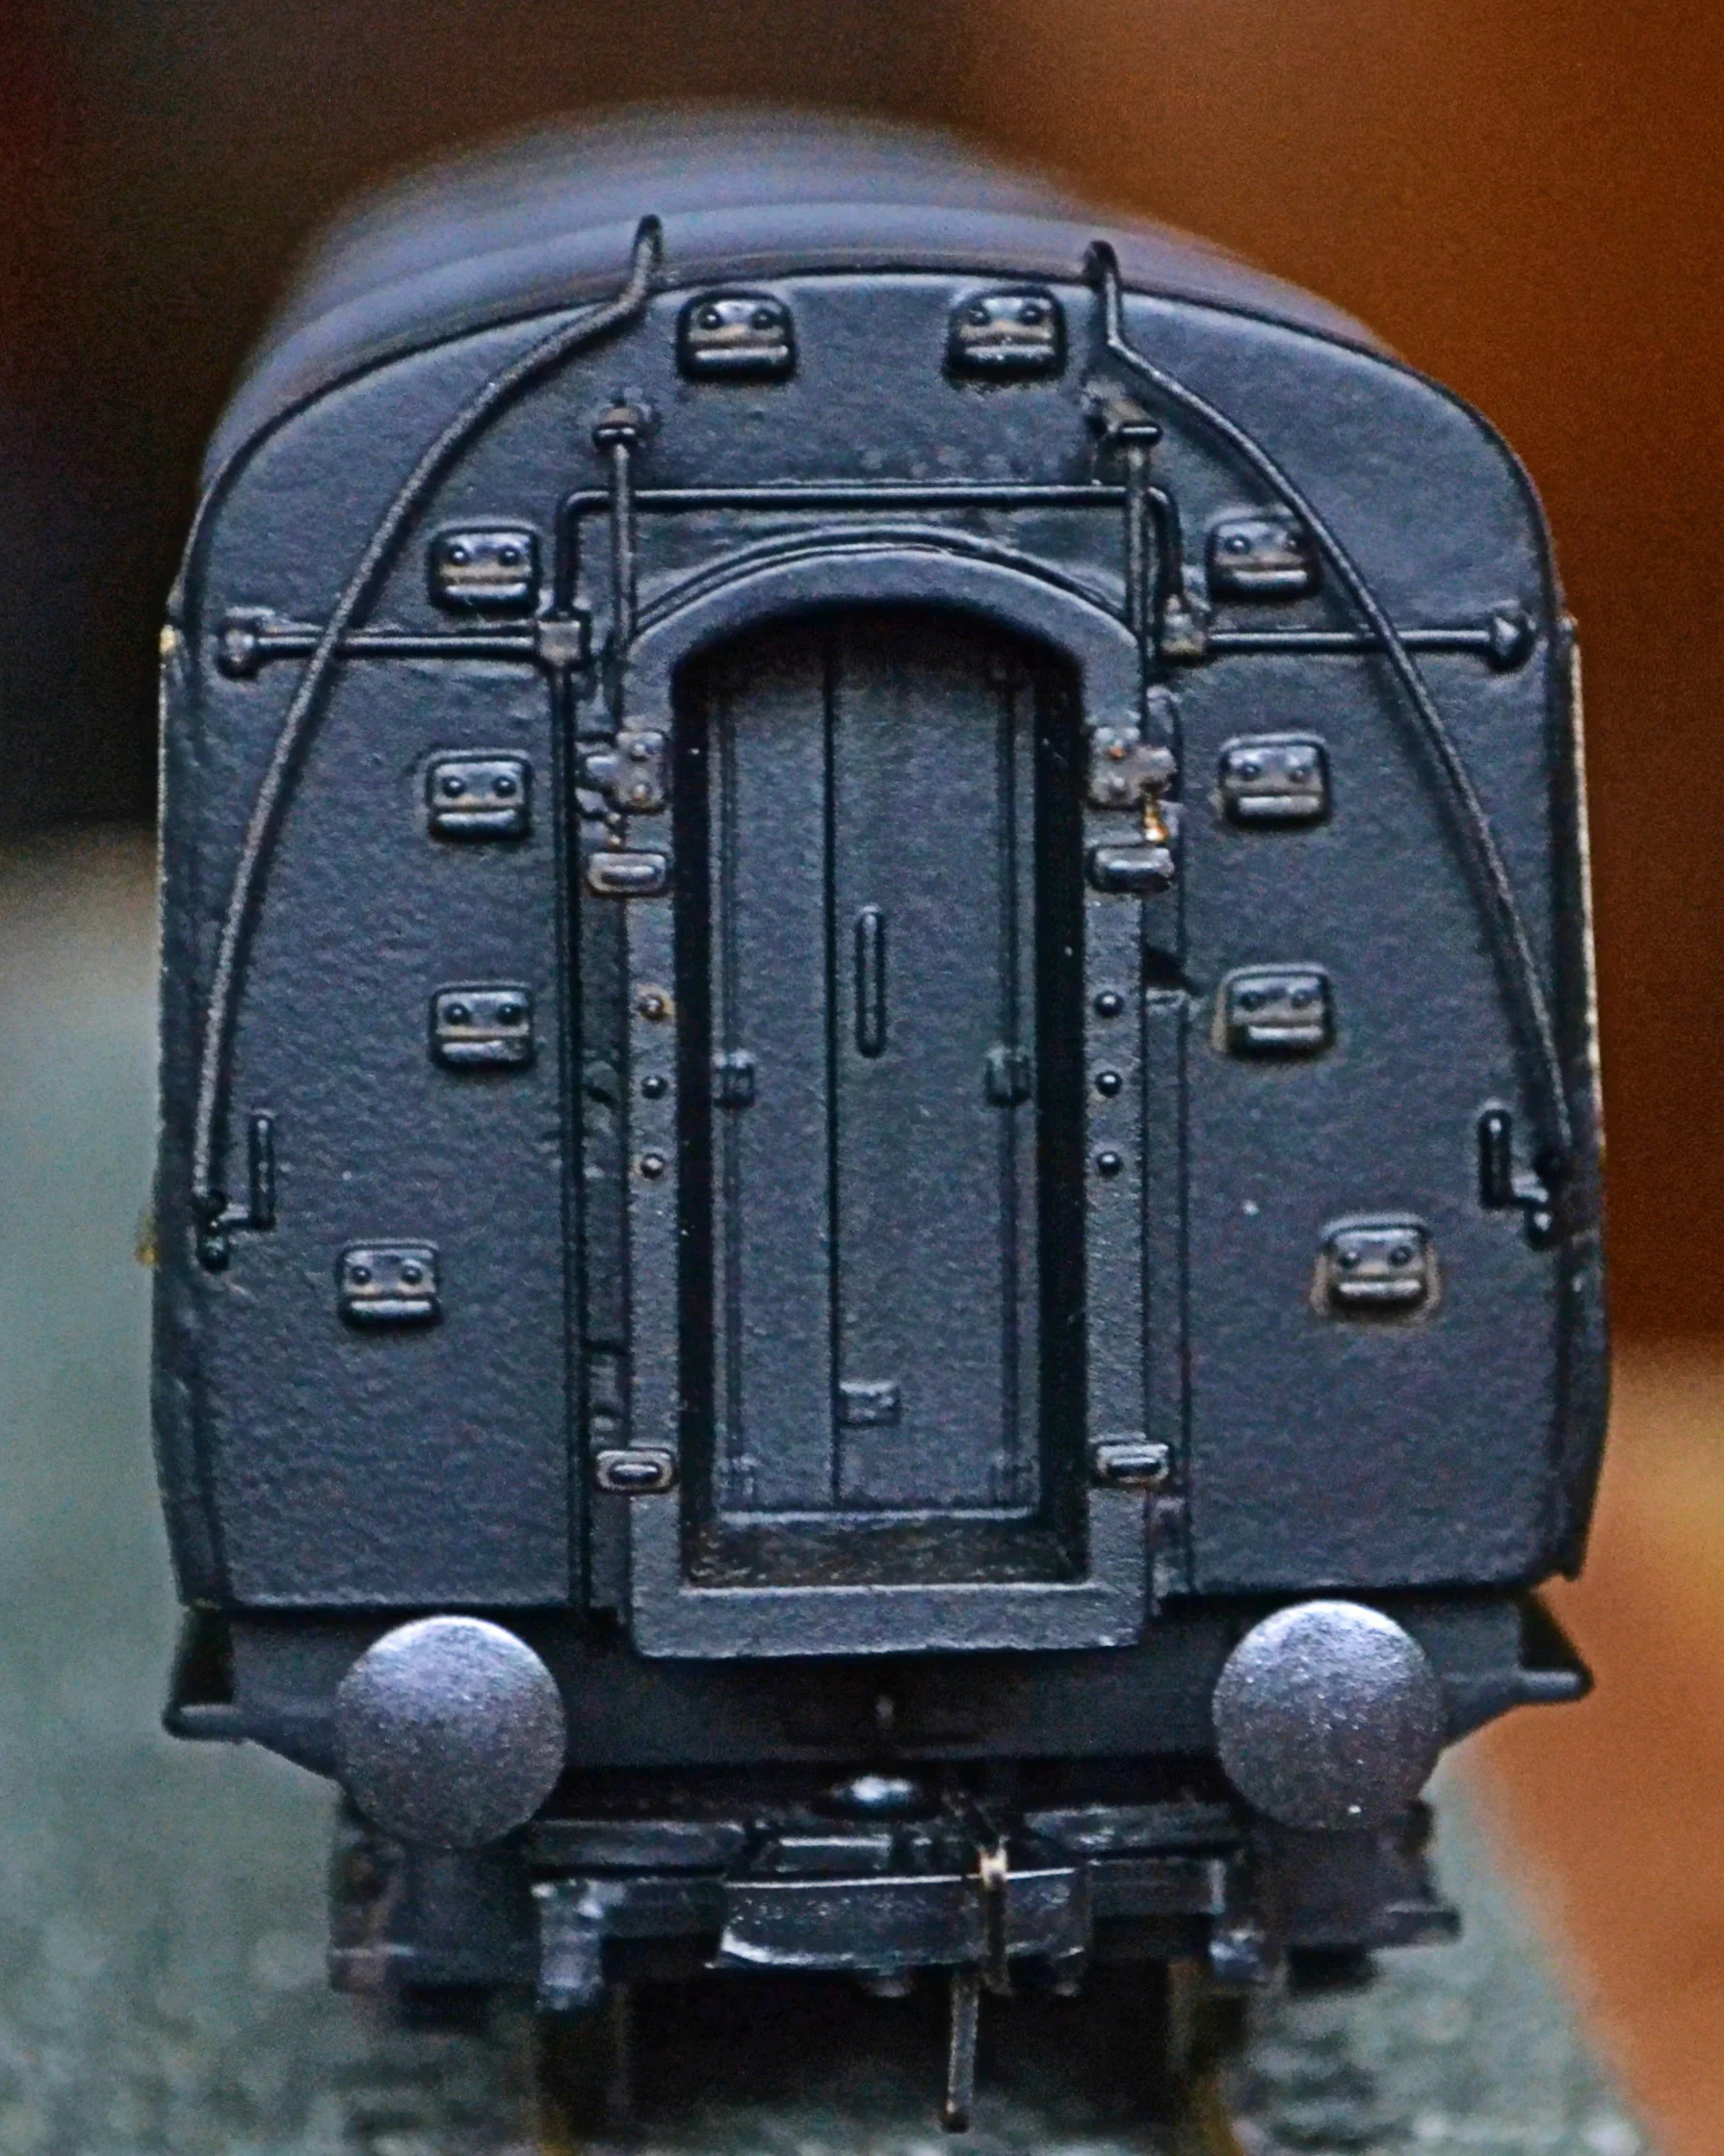
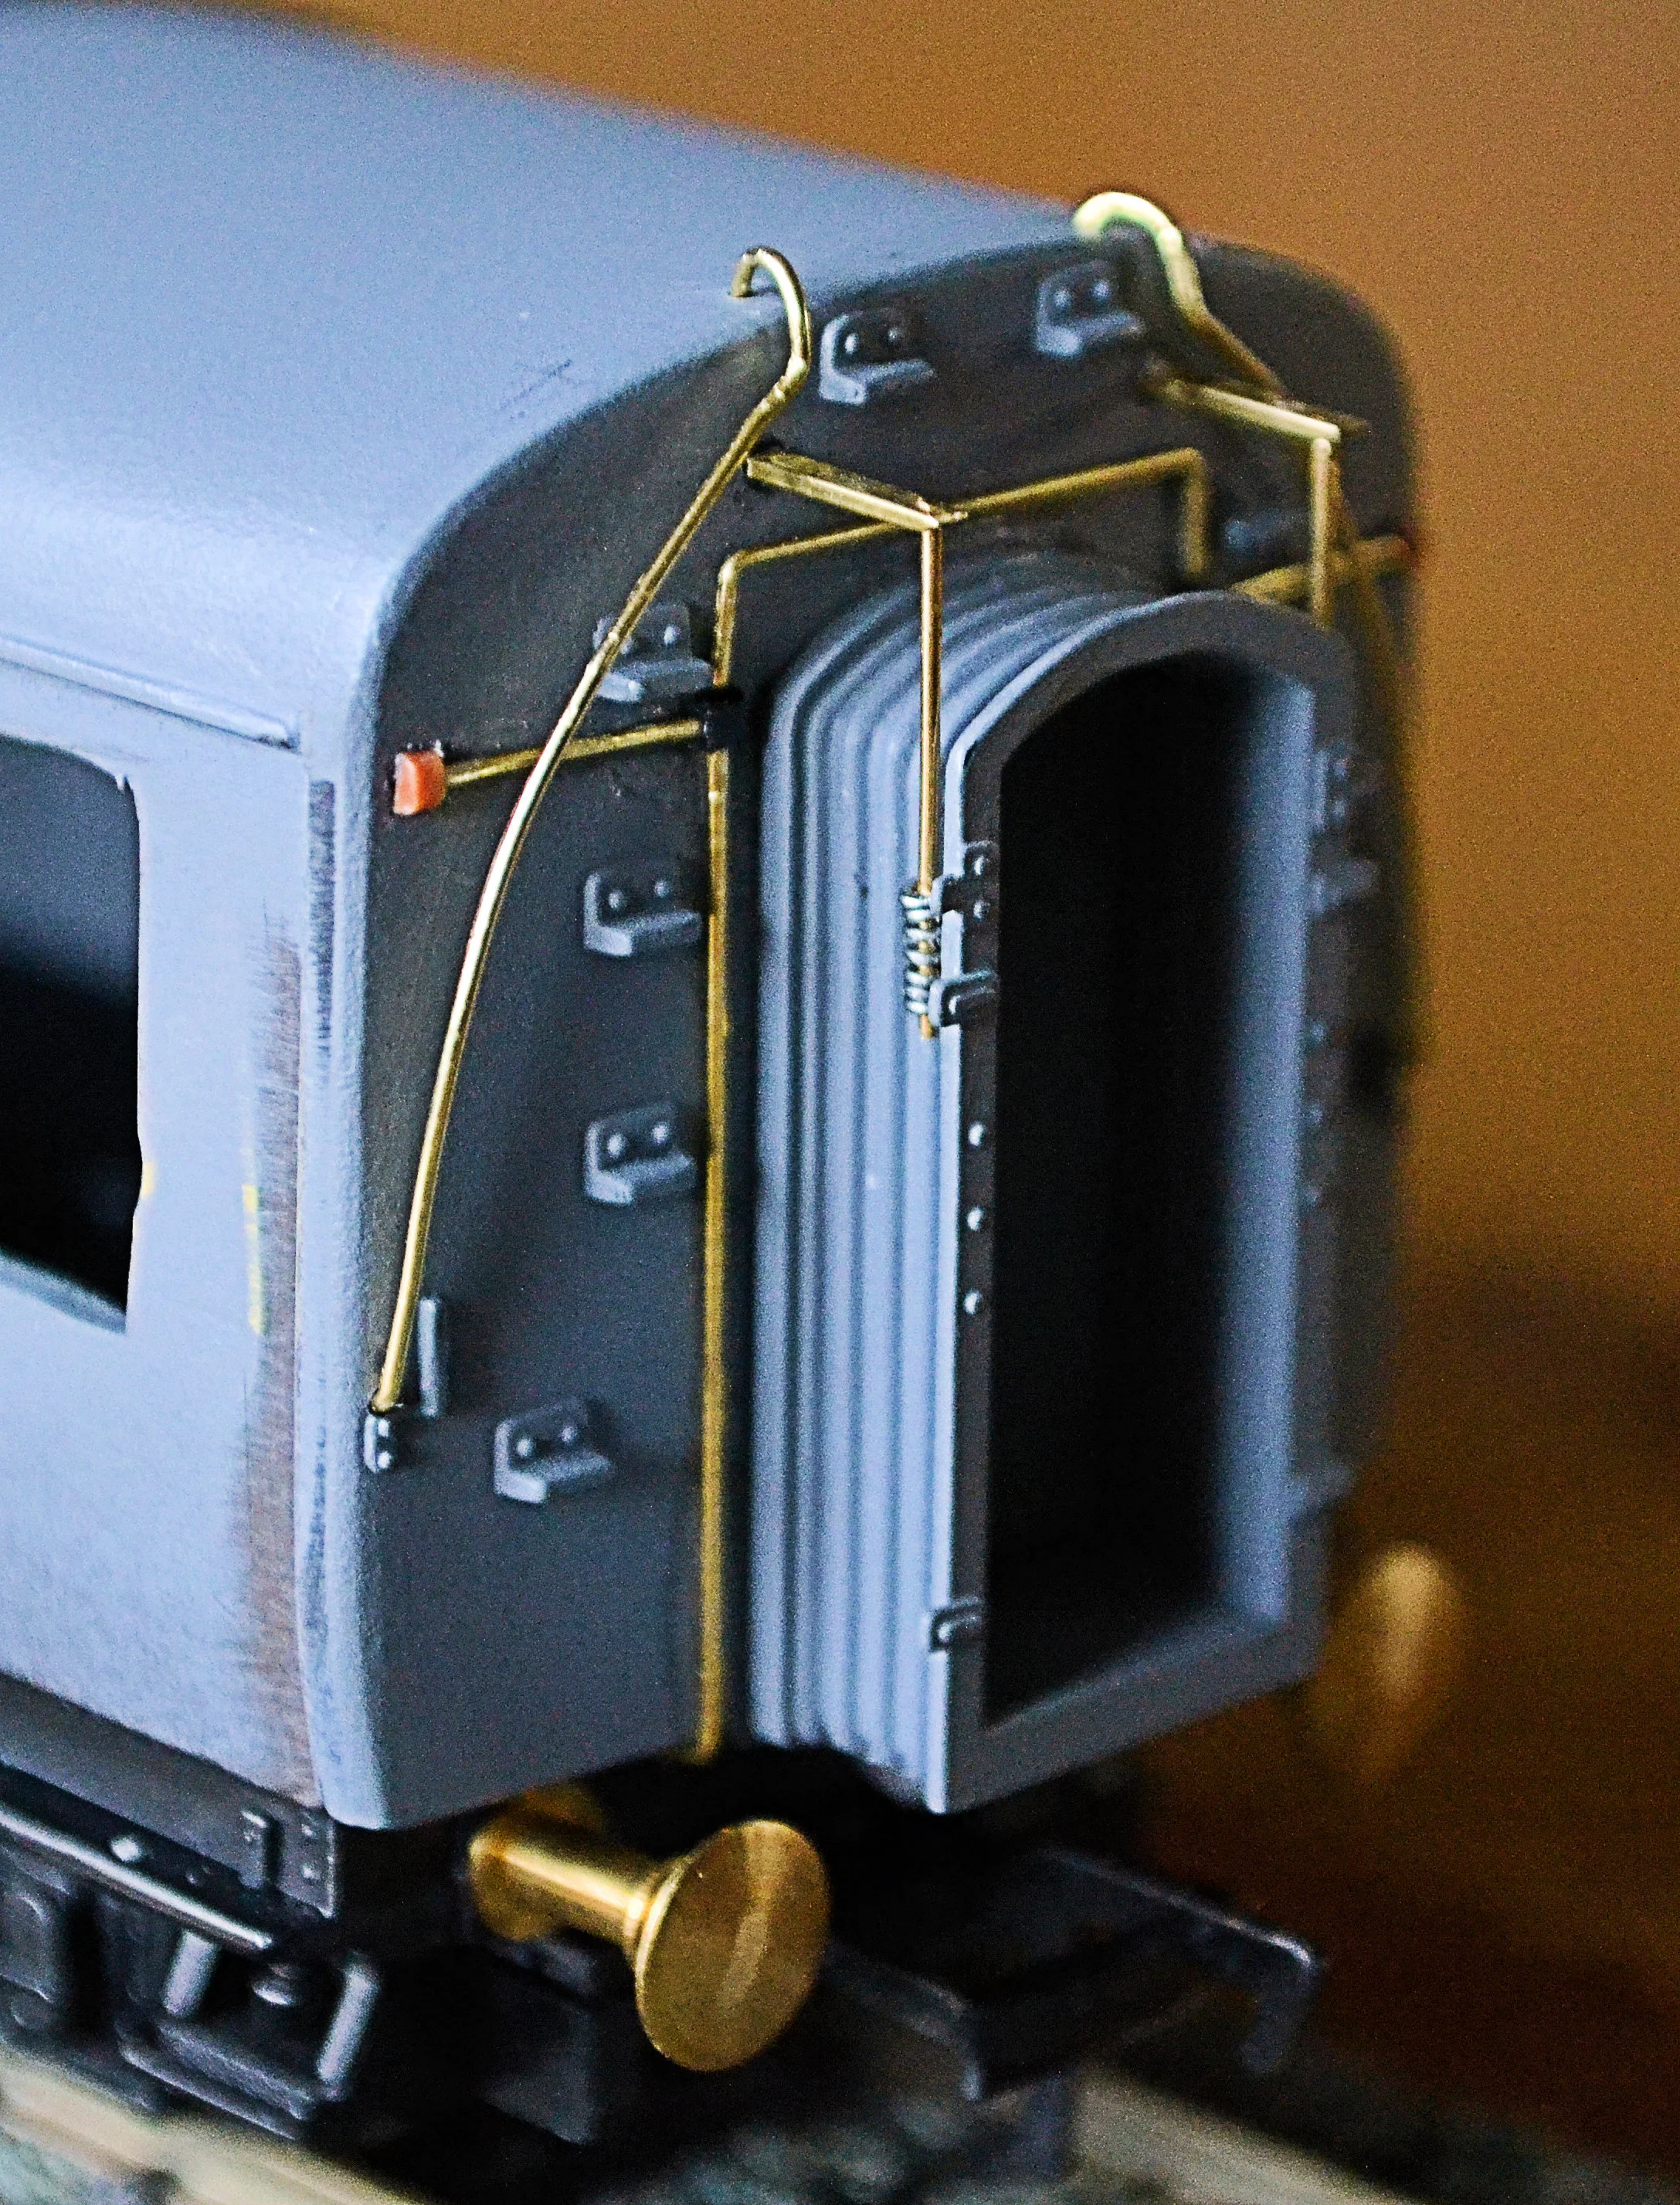
Fitting emergency brake rigging improves the coach end enormously and better buffers are essential too. The photograph below shows this done and a nice white-metal coupling hook fitted as well [from Lanarkshire Modelling Supplies]. The next detailing task will involve trying to fabricate some suspension brackets for the gangways. This will be tricky but worth the effort if it succeeds. The left hand buffer will be re-sited lower down in due course. Blown-up digital photos are quite helpful at spotting things like that
The next photographs will show that the modifications to the body shell are now complete. A trip to a recent show allowed me to source some incredibly fine brass channel which was ideal for the brackets to hold the gangway suspenders [brass and steel wire]. These units are not 100% accurate but even at less than three feet they more than pass muster and as the effect required is that of an acceptable layout coach, I am perfectly happy with the outcome.
Fitting the channel was a problem though: it's impossible to drill square holes ! Consequently, before priming, a little filler will be forced into the gaps to close them up completely [an easy job].
The handrails were bent up out of fine brass wire. It's far easier than it looks although care must be taken to ensure a good degree of symmetry. So, constant tweaking is the order of the day. These will be removed after the ends have been re-primed and put aside to be the last items to be fitted [to avoid damage].
The errant buffer has been adjusted also.

Not particularly worthy of photographing is the glazing. It is far easier to measure and cut this before attaching the sides. My method is to cut a strip of perspex just long enough to fit inside the coach body, place it against the window openings and then, from the outside, draw on the perspex with a pencil, so outlining the openings for each window. The perspex units then simply needs to be cut out of the long sheet and they will be a perfect fit. They will not be attached until much later in the build however. Another task not photographed involved cross-bracing the truss rods to a] add realism and b] give them greater strength.
With the body modifications now completed, it was set aside for work to commence on the sides. All that was required before painting was filing off any etching tags, adding door hinges and then degreasing the sides with IPA to clean them thoroughly.
Preparing the door hinges was mind-numbingly boring: 21 hinges needed to be measured, cut, filed and fitted to each side. Each side took a night but the end result was well worth it. The photographs below show the hinges in place.
The hinges were secured with super-glue and have held fast. They will soon be covered with Halfords' grey primer and, later, two top-coats. They will then be permanently fixed. The side in the photograph has not been fixed in place but only placed loosely on the body. You can see how well it fits however.
Priming the sides helpfully indicated where capillary action had drawn superglue up and down the door shut lines on either end of the hinges. This was cleaned out with the tip of a scalpel and the gaps reinstated. One hinge was blown away by the aerosol also, and this was replaced and the sides re-primed. They have now been set aside for the primer to cure fully over a day or two.
First coat of cream now applied:
Once this has hardened, it will be rubbed back gently with a very fine [3600 grade] finishing paper to remove specks of dust, etc., and to flatten it for a final coat.
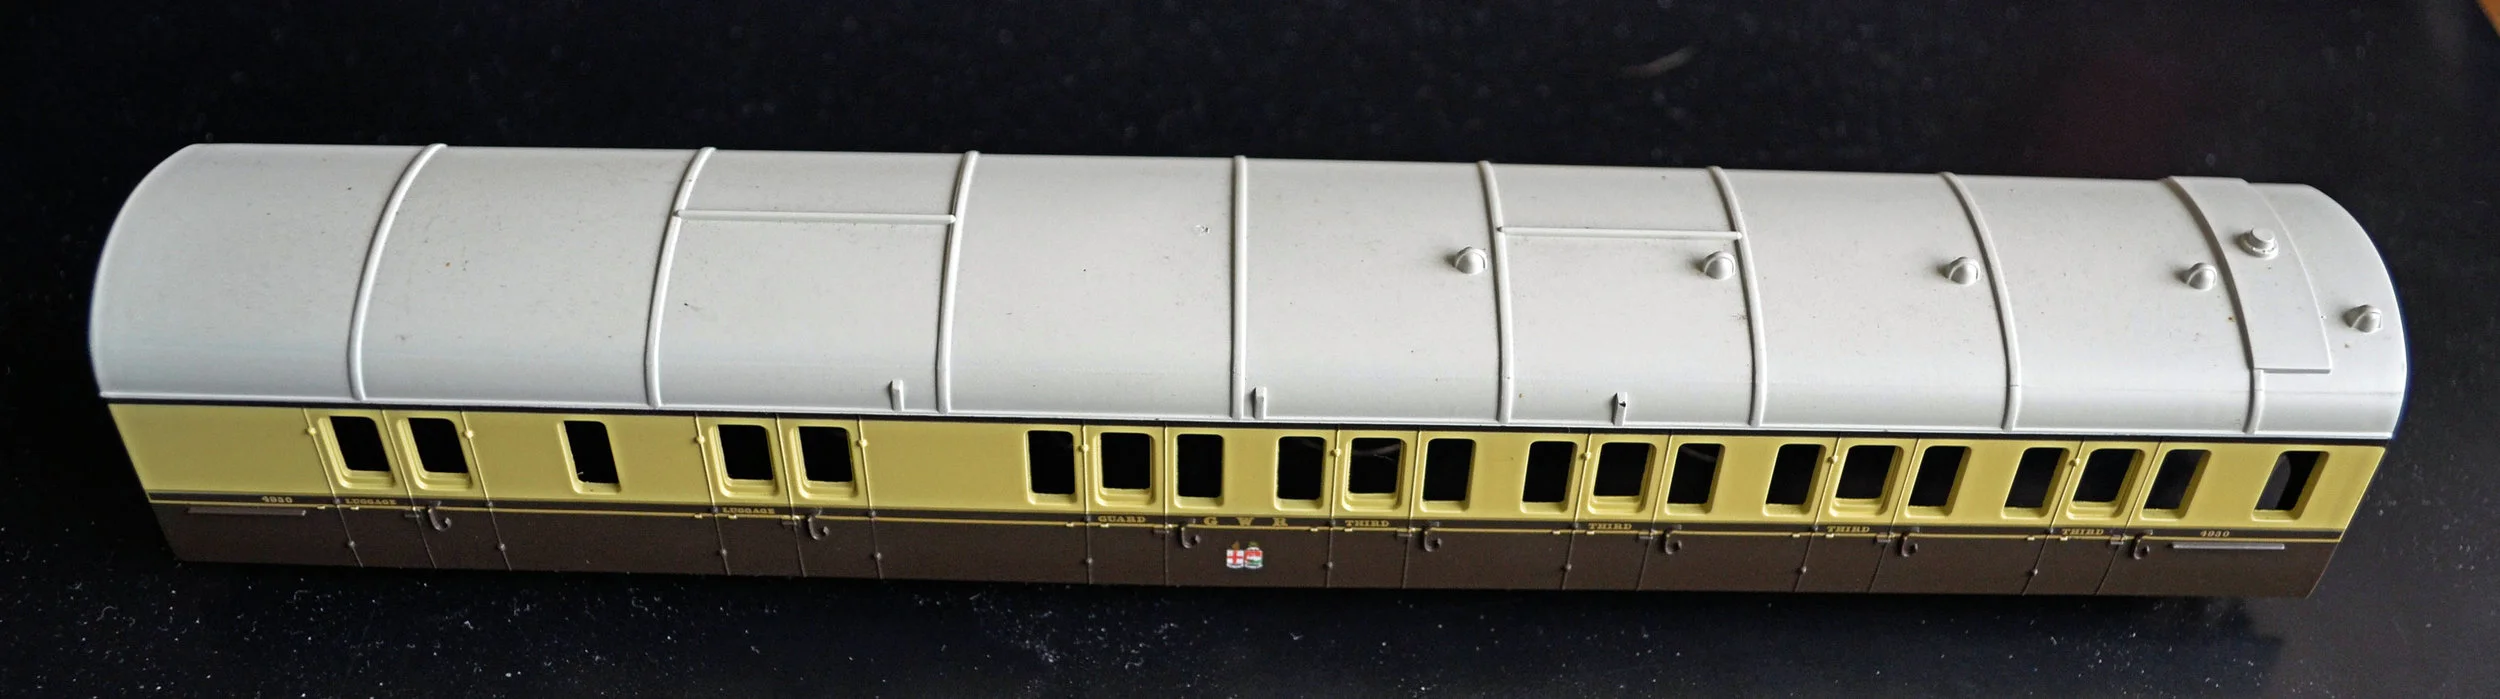
Progress is a little slow but it's getting there. The final coat of cream was applied and the sides then masked up for the chocolate. Lettering and lining has commenced also...
Bad weather and poor health have put something of a damper on this project but progress has resumed and now, with the sides lettered and varnished, reassembly will commence shortly. Of course it's not just a simple matter of glueing the sides on: nope, not a bit. There will be glazing to add, window bars to paint and locate, door handles and grab irons to install, additional steps for the guard's doors to be fabricated and attached and then the ends and chassis to be painted. But we're getting there. In the meantime:
The sides have now been attached to the carcass, a bit of a nail-biter as you have only one go at this: get it wrong and you might as well bin the lot. The lower half was attached with impact adhesive and the upper half, where the carcass was largely cut away, with superglue. Impact adhesive bonds instantly, quicker than superglue, and the thin brass overlays cannot be removed now without their total destruction. Sigh of relief, it's OK...
The ends however, as usual, require some filler to neaten the fit. Whilst the tumble-home on the brass overlay was a good match for the body sides, very slight differences in length and the slightly different profile of the originally-separate coach ends meant that a perfect fit was not attainable. This photo exaggerates the gap hugely, the sides are not really coming away, but it shows what I mean. Milliput will deal with it nicely and, when sprayed black, will be all but unnoticeable.
The coach is now nearly complete. Glazing and window bars/ grilles have been added and door furniture and handrails have been fitted to the sides.

Reviewing the above photograph, I noticed that the guard's lower handrail is not the correct pattern. It will be removed.
At last this project is now complete. Some projects take longer than others but this has been bumping along the bottom for about three and a half months. Overall however, I'm about 95% content with the outcome. Glazing and fitting the interior grilles and bars was far more trying than I had anticipated and the unavoidable, continuous handling of the completed body left its marks too: there was quite a lot of careful cleaning up to do, including removing [successfully] some epoxy fingerprints.
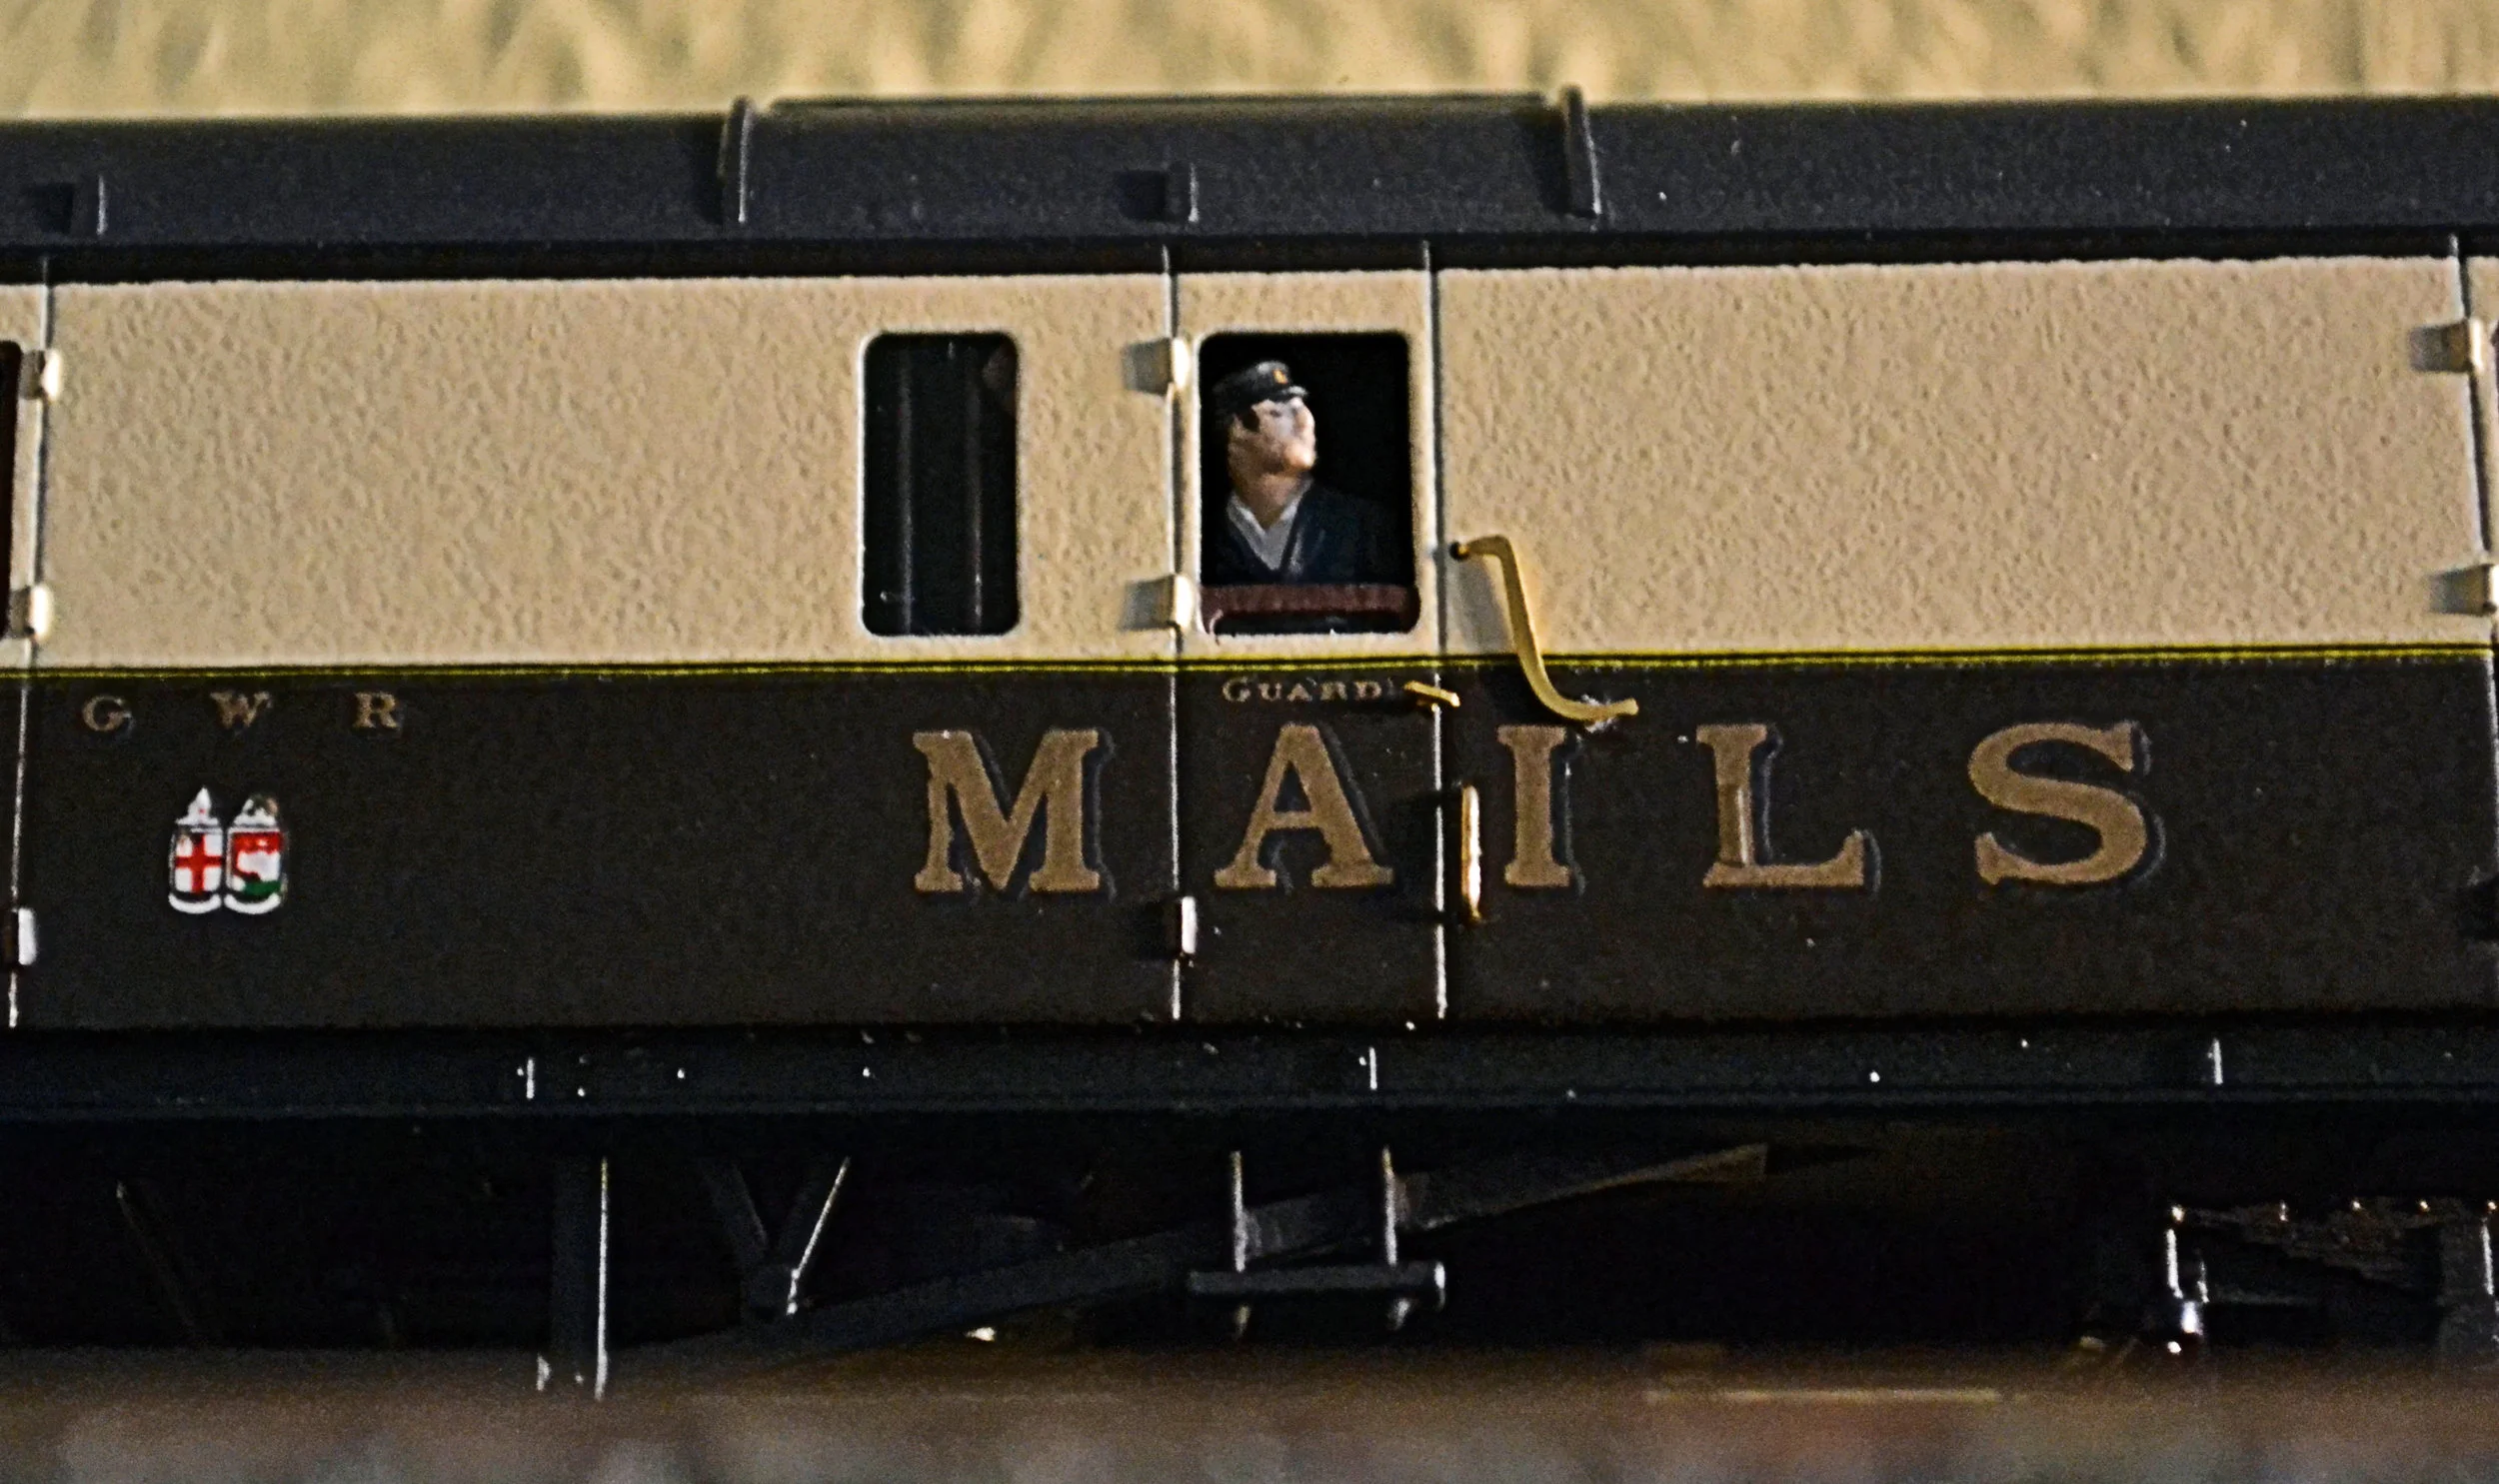
The Guard was very much an afterthought but he'll be easy enough to remove if I decide he spoils the effect.
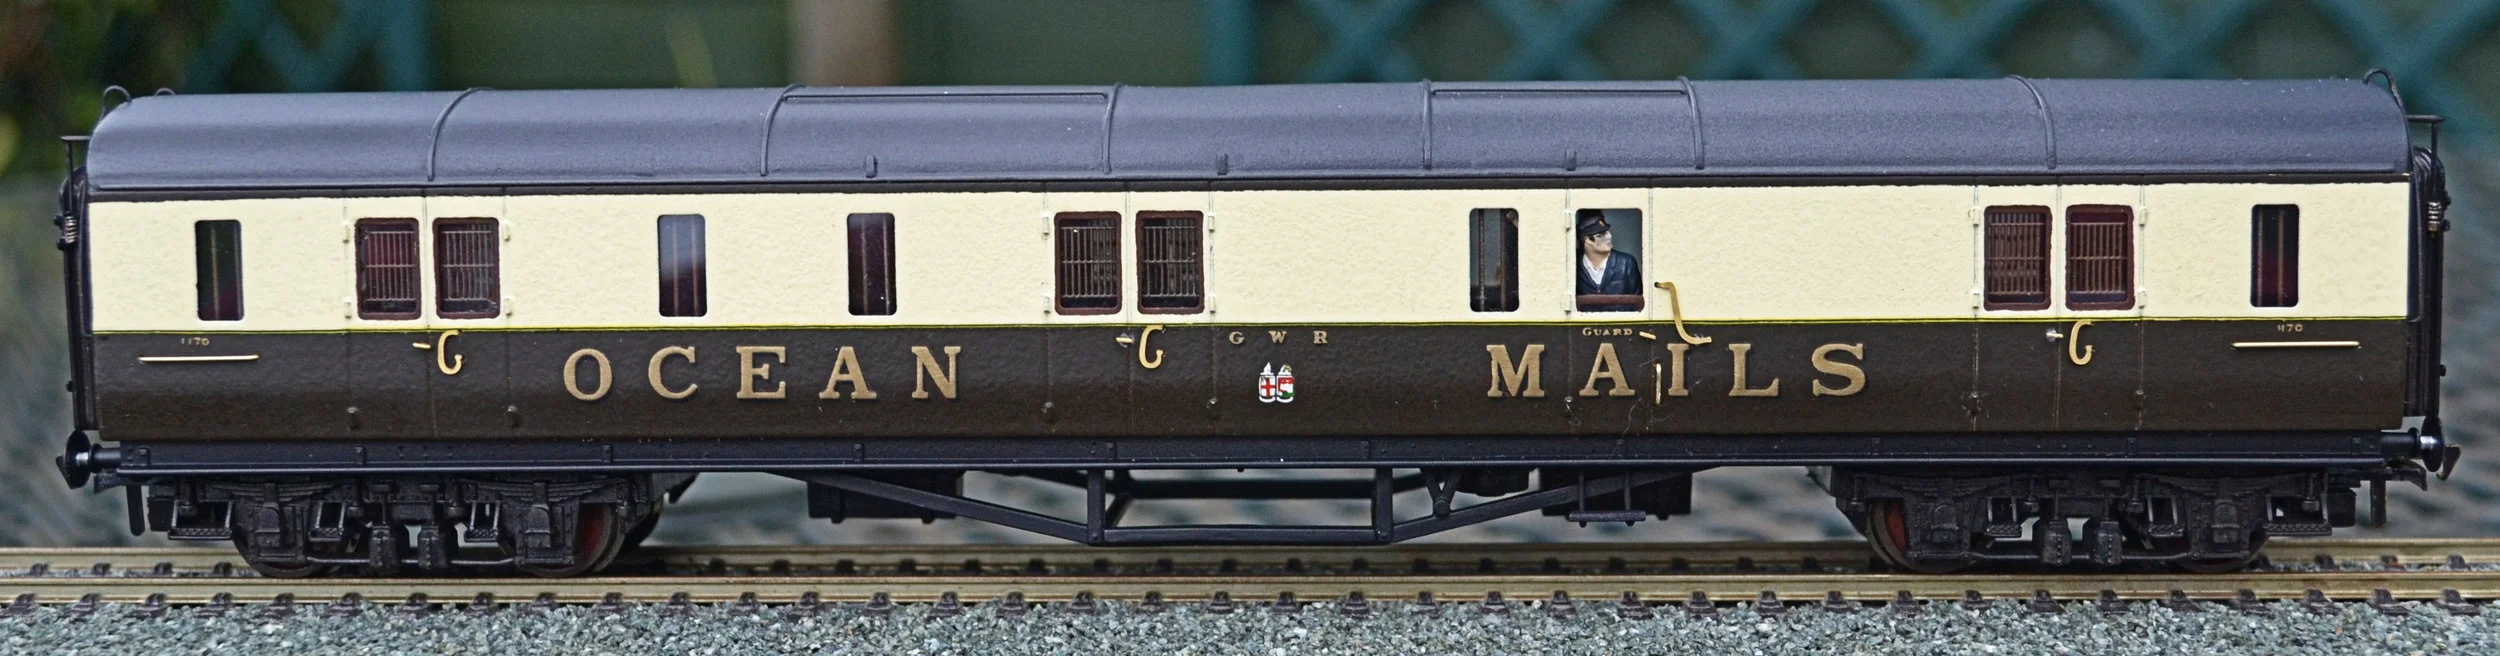
Both ends came out very nicely too. Some light weathering brought out the detail which a spray of matt black had completely masked. Overall, this was a moderately straightforward adaptation of a Hornby 'Railroad' coach. It didn't cost a great deal in terms of cost but it did in terms of time. Consequently, a number of other projects have been on old for a while: I'm looking forward to cracking on with them now.