- The Mark of The Devil -
by Tony Richards

by Tony Richards
Planet Industrials released a really superb model of this substantial industrial tank a while back, equipped with a flywheel-driven high torque motor and excellent detailing. It was reasonably priced too, by latest standards and, for a while, available for under £100. The variety of liveries was impressive as well.
I wouldn't normally buy an industrial but this one offered an interesting opportunity. With relatively little work, it could be converted into one of the two 1917-built 'Victory' tanks that found their way onto The Alexandra (Newport and South Wales) Docks and Railway roster after The Great War. The ADR was one of the shorter South Wales railways absorbed into the post-Grouping GWR and the new company kept the two 'Victory' tanks, numbering them 666 and 667 (they became the tiny 666 Class). Each received a slight rebuild by Swindon and both lasted in British Railways. The Brecon and Merthyr also ran a 'Victory' but that ended up as a colliery loco after a few years in GWR ownership. The last of this class of 10 tanks was scrapped in 1969 and, so, none survived into preservation. Neither 666 nor 667 were vacuum fitted and so, whilst built to mainline standards, spent their lives shunting heavy coal trains in and around Newport Dock.
To make this conversion I purchased from Planet Industrials their etch of rivetted tank-side overlays, etched brass cab-side numbers and a maker’s plate, a brass safety-valve bonnet and GWR-pattern whistles. I also dug out from the bits box a pair of Pannier-style tank filler covers and some brass spectacle plates.
Here is the model as bought:

The conversion will involve: fitting etched brass, riveted tank/cabside/bunker side overlays; removing the existing safety valve and its raised base and replace with a correct pattern GWR bonnet; removing the tank fillers and fitting correct pattern GWR ones in a different position; fitting a smoke box oil pipe; fitting correct pattern whistles; adding correct etched brass number and maker's plates.
The model will be painted in post-'28 GWR green, numbered 666 and lettered GREAT WESTERN.
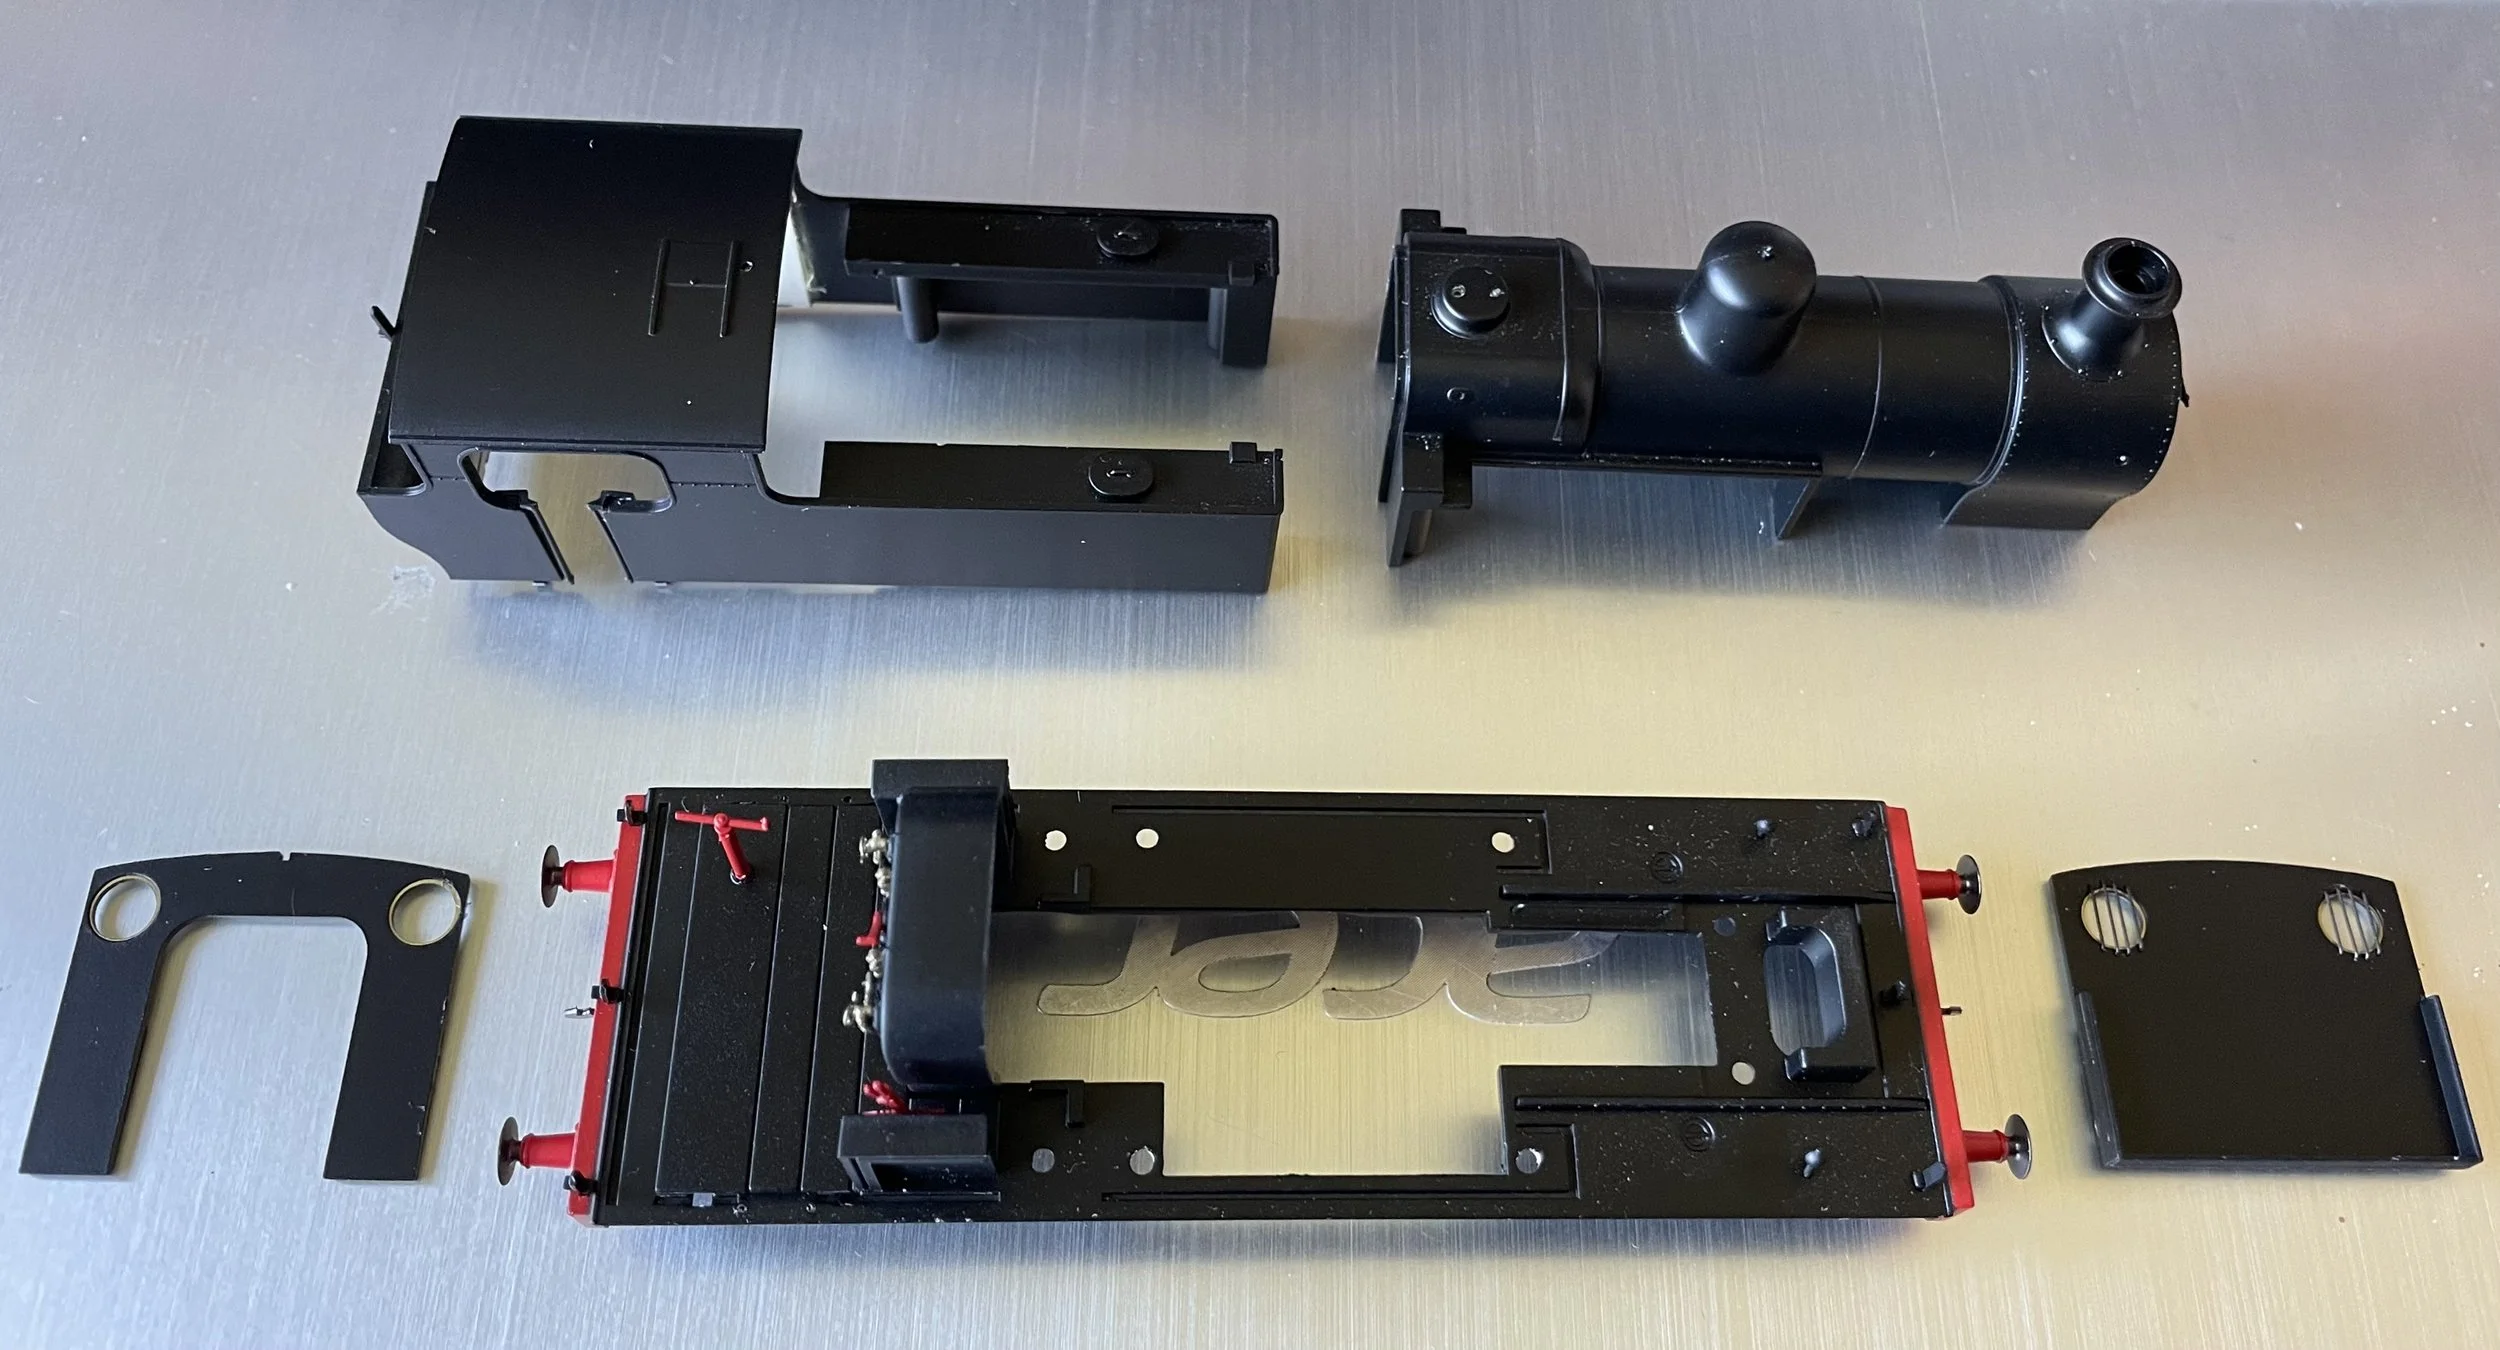
This is the dismantled the model and the photo below shows the body parts with the footplate. The footplate and boiler unit are diecast pieces. The rest is plastic. There are, of course, many other smaller parts which have been safely bagged. Dismantling the body was quite easy although the original tank filler tops had to be drilled out and thrown away as they were too strongly glued in place (not shown below). Not a problem though. This conversion can be carried out without completely dismantling the loco if one wishes, but doing so makes repainting far easier.


The most awkward part of the conversion [well, so far] involved filing down the seat for the original Ramsbottom-type [I think] safety valves. The alloy base was not too hard and a selection of files made relatively quick work of it with only a small amount of paint scratching. The brass bonnet sits nicely over the hole and as the whole casting will be primed and repainted, the cosmetic damage won't show. It really does look far worse than it actually is. The out-of-the-box photo above shows how much required removing.

I have now filled and sanded flush the holes left by removing the original water tank fillers. This took a couple of applications but, with a small strip of plastic card glued up against the underside to give a floor for the putty, all came out well. I'll see just how well when I apply some primer though. Sadly, I wasn't able to keep the tank fillers for another project - they had been superglued in and required drilling out ultimately.
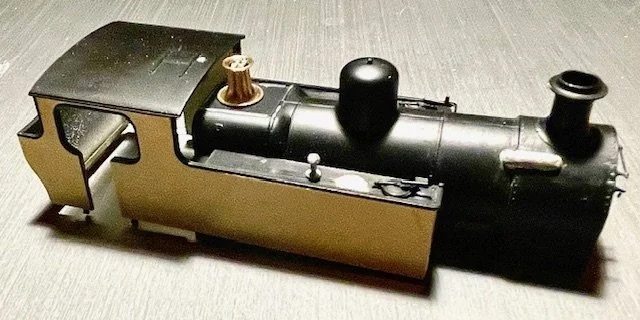
Next, the sides etches have been attached. This was extremely fiddly and I was really pleased that I had purchased two sets [at only a tenner per set] in case of difficulties. The tiny strip that sits under the cab roof is truly fragile and prone to easy mis-shaping. The sides were separated on a ceramic tile to provide a hard, completely flat surface but, even so, one failed and broke. So, set two was used. I attached the sides in two stages: first the tank sides and front of the cab sheet were epoxied in place; second, when stage one had cured and the front edge was given a slight rounded chamfer, the rear part and cab roof strip was superglued in place. Excess adhesives were wiped away using an IPA-drenched tissue. It all looks OK I think. The rivets can be seen in the photo but they may disappear under primer and paint.
Photos show progress.
The GWR-pattern safety valve bonnet I purchased from Martin Blackwell is an exquisite brass turning with detailed, separate internal valves. Sadly, it will have to be primed and painted green like most of the rest of the body however and won't be able to shine and announce its presence. Here are a couple of photos to show it [a dry fit] before the paint arrives....
The tank vents and GWR-pattern tank fillers have been fitted and the original single whistle hole in the cab roof filled. The new whistles will be the very last thing to be fitted however and I have two very nicely turned brass pieces for that. I'll drill out their fixing holes before painting.
The safety-valve bonnet has been glued in place and the cover for the smoke box oil pipe fitted. I am not at all happy with the latter however, it was a relatively crude white metal casting and not 100% correct for this tank. It was the only one I could find however and, once adapted, was superglued in place. It looks messy though. I'll see how it appears after priming and am sure that it can be cleaned up a lot. It'll have to be, because it cannot now be removed without damage! That said, this is an extremely poor photograph and it really doesn't look that bad in reality

The main body parts are now in primer and, generally, all is OK. The paint shows that the overlays were not a completely exact fit in terms of size, but top coats will deal with that nicely. No sign of the filler used either, and the cover for the smoke-box oil pipe came out better than I had anticipated. In fact, all of the additions look quite original. New whistle holes have been drilled in the cab roof.


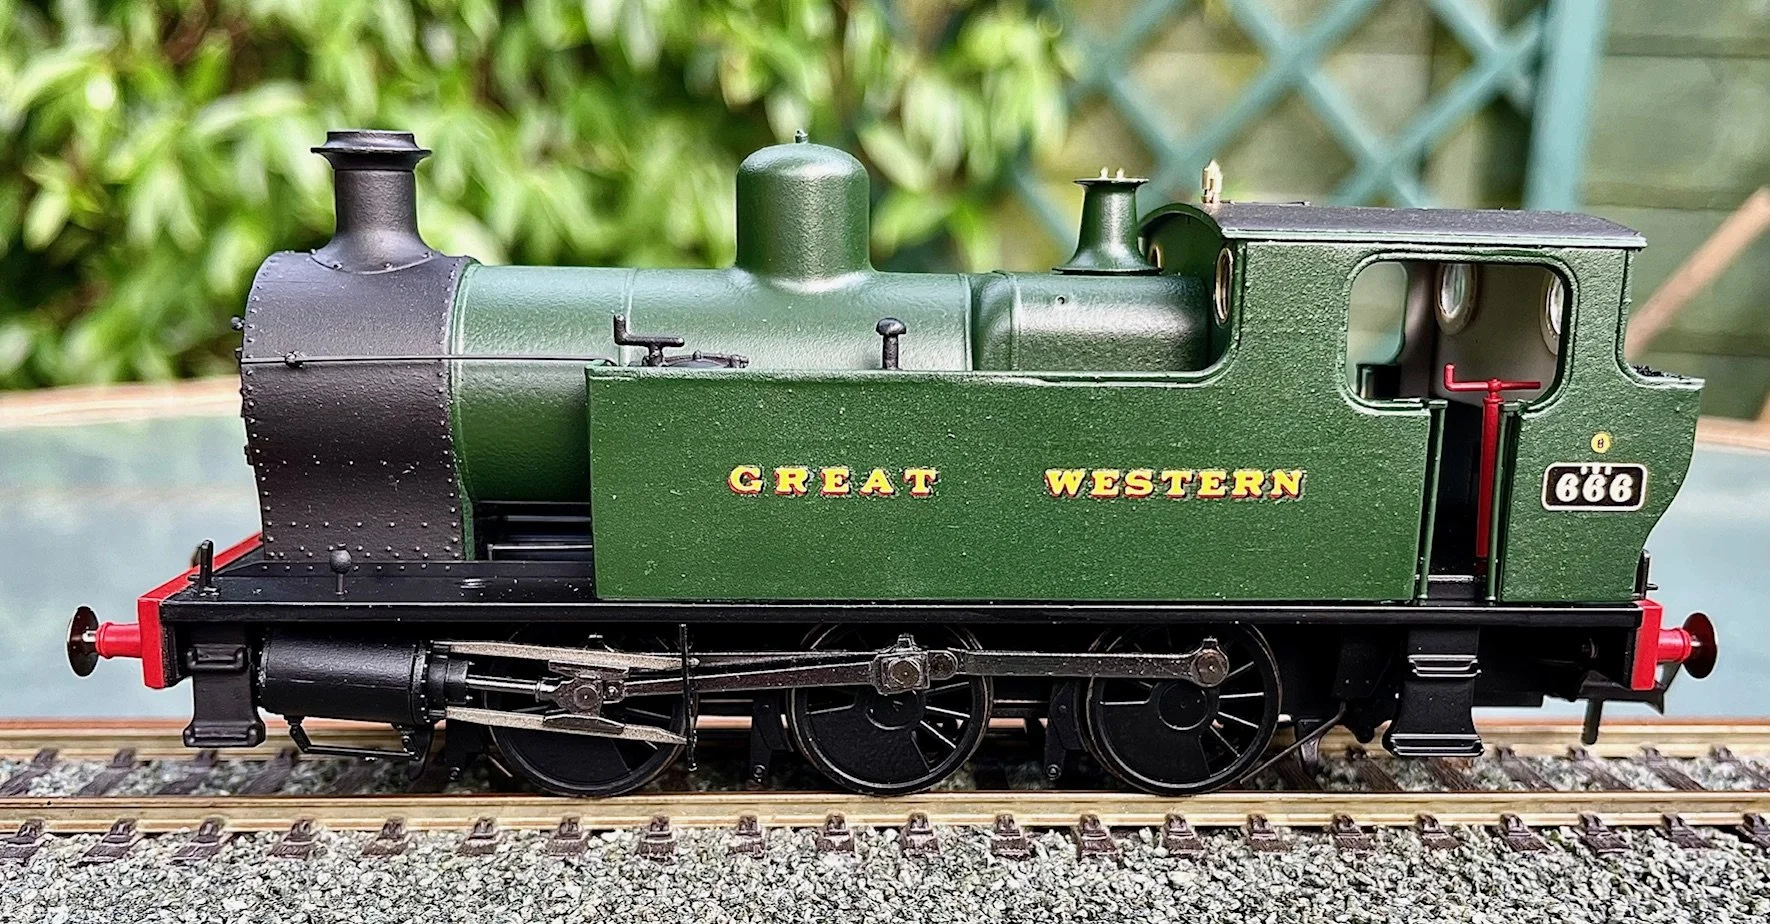
With the primer applied, the two main body parts - the fire box / boiler / smoke box and the bunker / cab / tanks - were separately painted before reconstruction took place. The cab roof, boiler and smoke box were brush painted but the sides were sprayed to avoid any brush marks. The GWR post-’29 Green used was by Railmatch and the matt black was Model Colour. The photos below show the finished product with the addition of spectacle plates on the front windows, lettering and numbering and the cab-side number and single maker’s plates attached. The bunker has also been coaled. The body was varnished once the lettering had been applied.
In the main, I'm quite happy with it. The only real problem experienced was that on neither side was the thin brass etch absolutely the same size as the body. It's minimal however, and looks nowhere near as prominent in reality as it does in the photos. I could fill one of the slight gaps and repaint but I'm not really sure that I could be bothered. The number plates and builder's plate are particularly nice now they’ve been painted and the brass spectacle etches for the front of the cab were well worth applying, too.
