- Victorian 4-wheeler -
By Tony Richards
A short account of the building of an unusual prototype
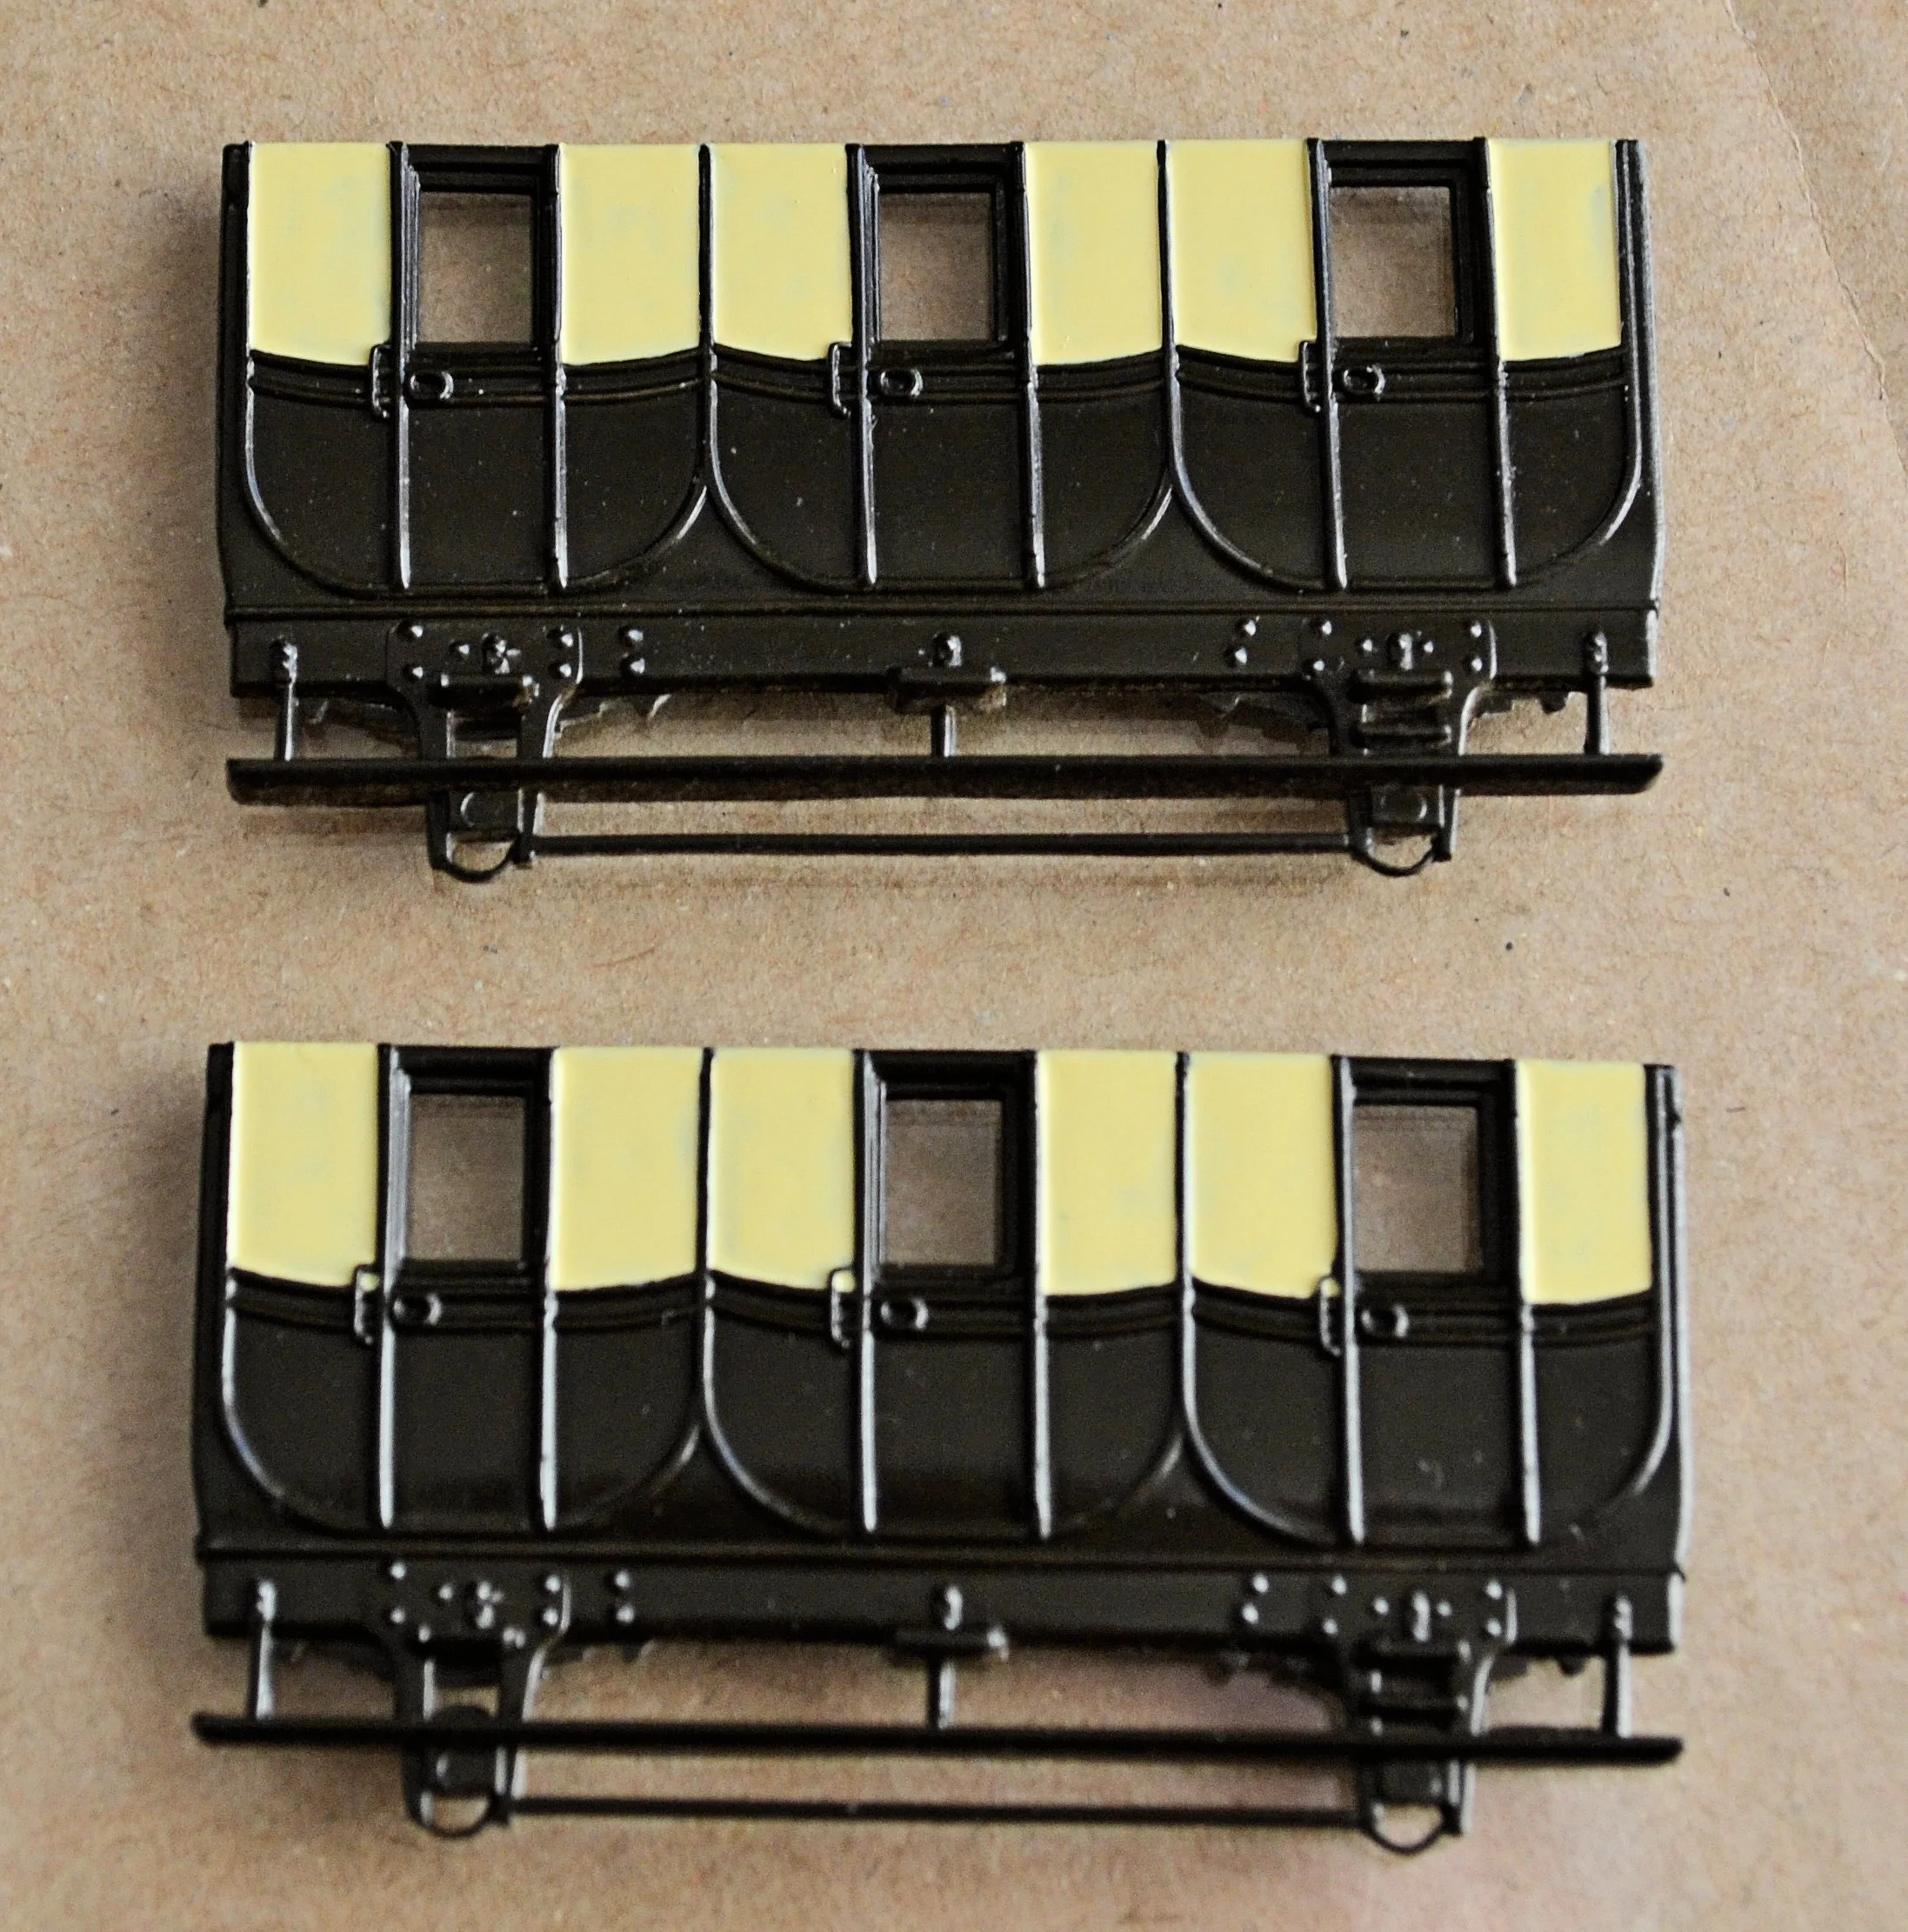
Quite a few decades back, N&C Keyser also produced a number of white-metal kits for foreign steam prototypes in HO scale, mainly for the European market. These surface on eBay from time-to-time and, for one of those [a small Spanish engine], K's produced a set of plastic 'Mataro' coaches. A single kit contained parts for two slightly different passenger coaches, as can be seen above, and whilst I'd seen the kits for sale occasionally, I had never seen a completed model and that set the hare running....
These preserved Spanish coaches are probably the prototypes for K's kit:
This build proceeded purely out of curiousity, that and the fact that the two coach kit was acquired via eBay for a fiver all-in. I have seen this kit go for £20+ before [why?] and there is a report somewhere in RMWeb of one going for £30. At a fiver or so it was well worth the risk; I'd not have paid more however
Anyway, enough of that. The models are, of course, HO, and small at that. I have yet to start its pair but they will probably end up running behind the Hornby/Electrotren HO 0-6-0 tank, possibly accompanied by an almost as small 4-wheel Finecast Bullion Van.
For the first build, the sprue contained only five really usable parts: ends, sides and roof, and they all required hot-water manipulation and surgery to obtain just an 80% square fit. I ended up using the supplied plastic buffers as they were broadly of the correct pattern and, anyway, I had nothing which would fit although they, too, required surgery. A floor required fabrication also, to give the completed body some rigidity. The wheels and couplings that came with the kit were binned. I fitted metal Lowmac wheels in brass bearings to ensure smooth running.
The handrails for the railway equivalent of a postilion were also binned: far too overscale, as was the roof-mounted screw brake. I have yet to decide how to letter this coach and may yet fit handrails formed out of thin brass wire.
After the trials of preparation for construction, painting was something of a breeze. The sides were painted first and each was hand-painted, all over, in several well-thinned coats of chocolate brown. These were put to one side for the paint to cure fully before the sides were then brushed over with Johnsons' 'Klear'. This was done to ensure that the next coats of paint, for the cream panelling, did not attack the soft brown undercoat. Well-thinned cream was then dropped by brush into the panelled areas and capillary action spread it out neatly to the raised edges, filling the void. Several coats were applied in this way to build up the colour. The photograph opposite shows the sides painted and set aside to harden off:
Once the paint had hardened sufficiently for handling without damage, the axle boxes in each side were drilled out to accept brass bearings and the body was assembled. I started by joining a side to an end with liquid poly glue, attaching the plastic-card floor to the construction with two-part epoxy and then, when that had cured, glueing on the other end and side. The inside was then painted and the windows glazed. The roof was sprayed with matt black from a Halford's aerosol and glued on. White-metal oil lamp pots [from the bits box] were glued into place to give the roof some detail. The coach ends had their buffers added: a lot of trimming and filing was required here with both the buffers and ends receiving attention. A white metal coupling hook was then glued into place in each buffer beam.
The sole bars and coach ends were hand painted with two coats of thinned matt black and the door handles and grab irons finally picked out in brass. Cut-down Bachmann couplings were super-glued in place with their tails trimmed to avoid fouling pointwork.
The next photographs show the finished model:
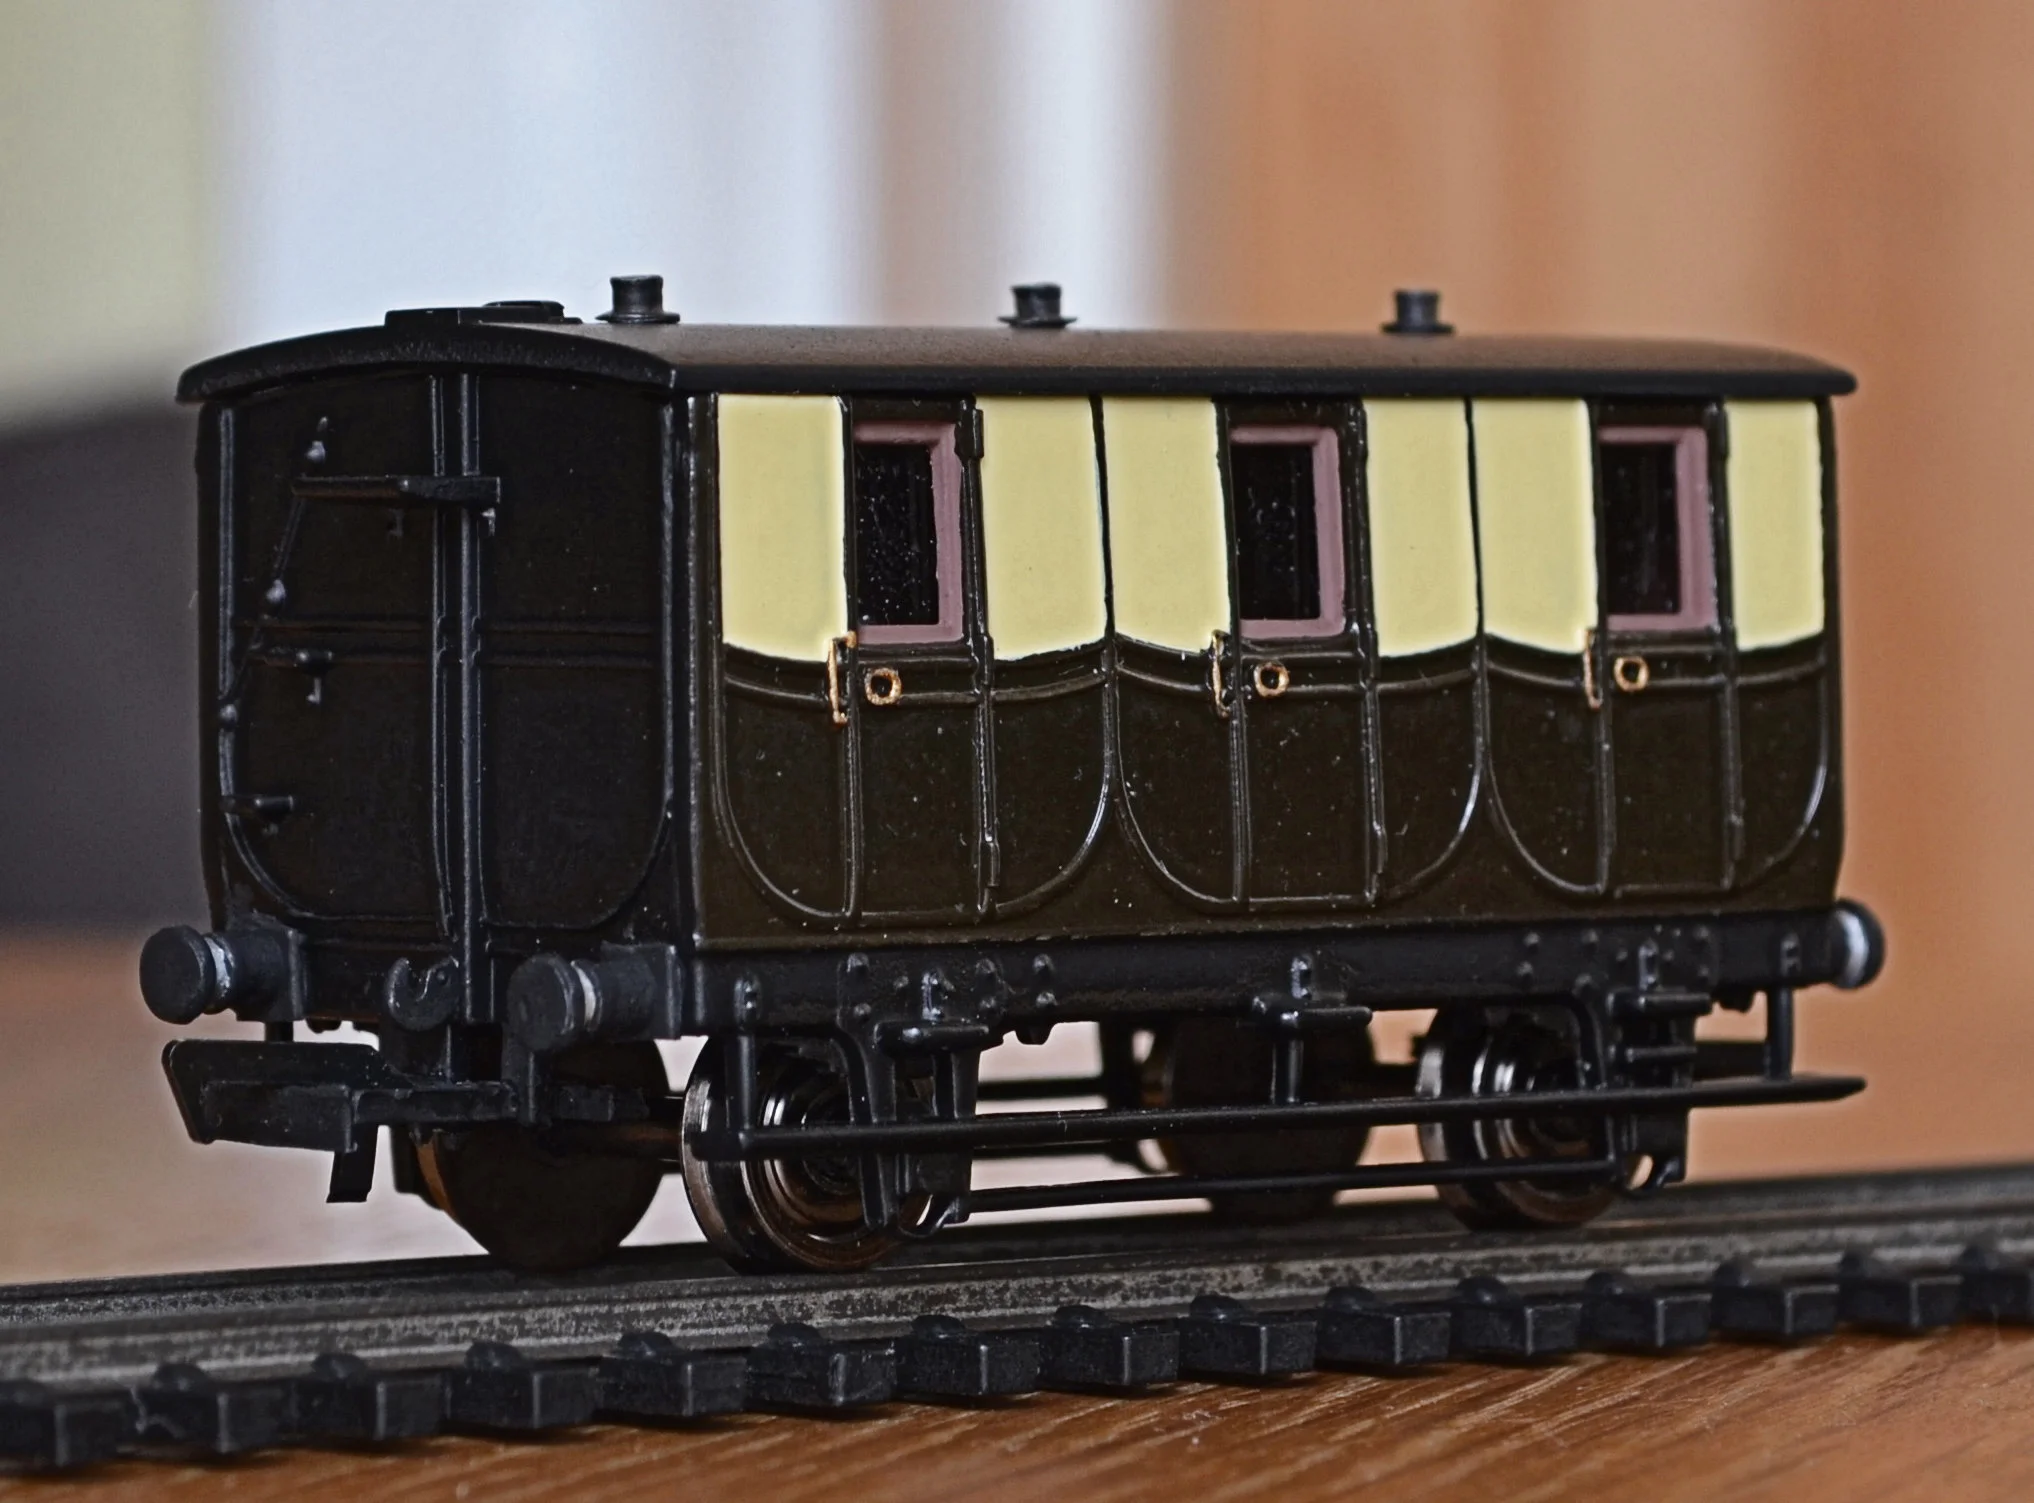
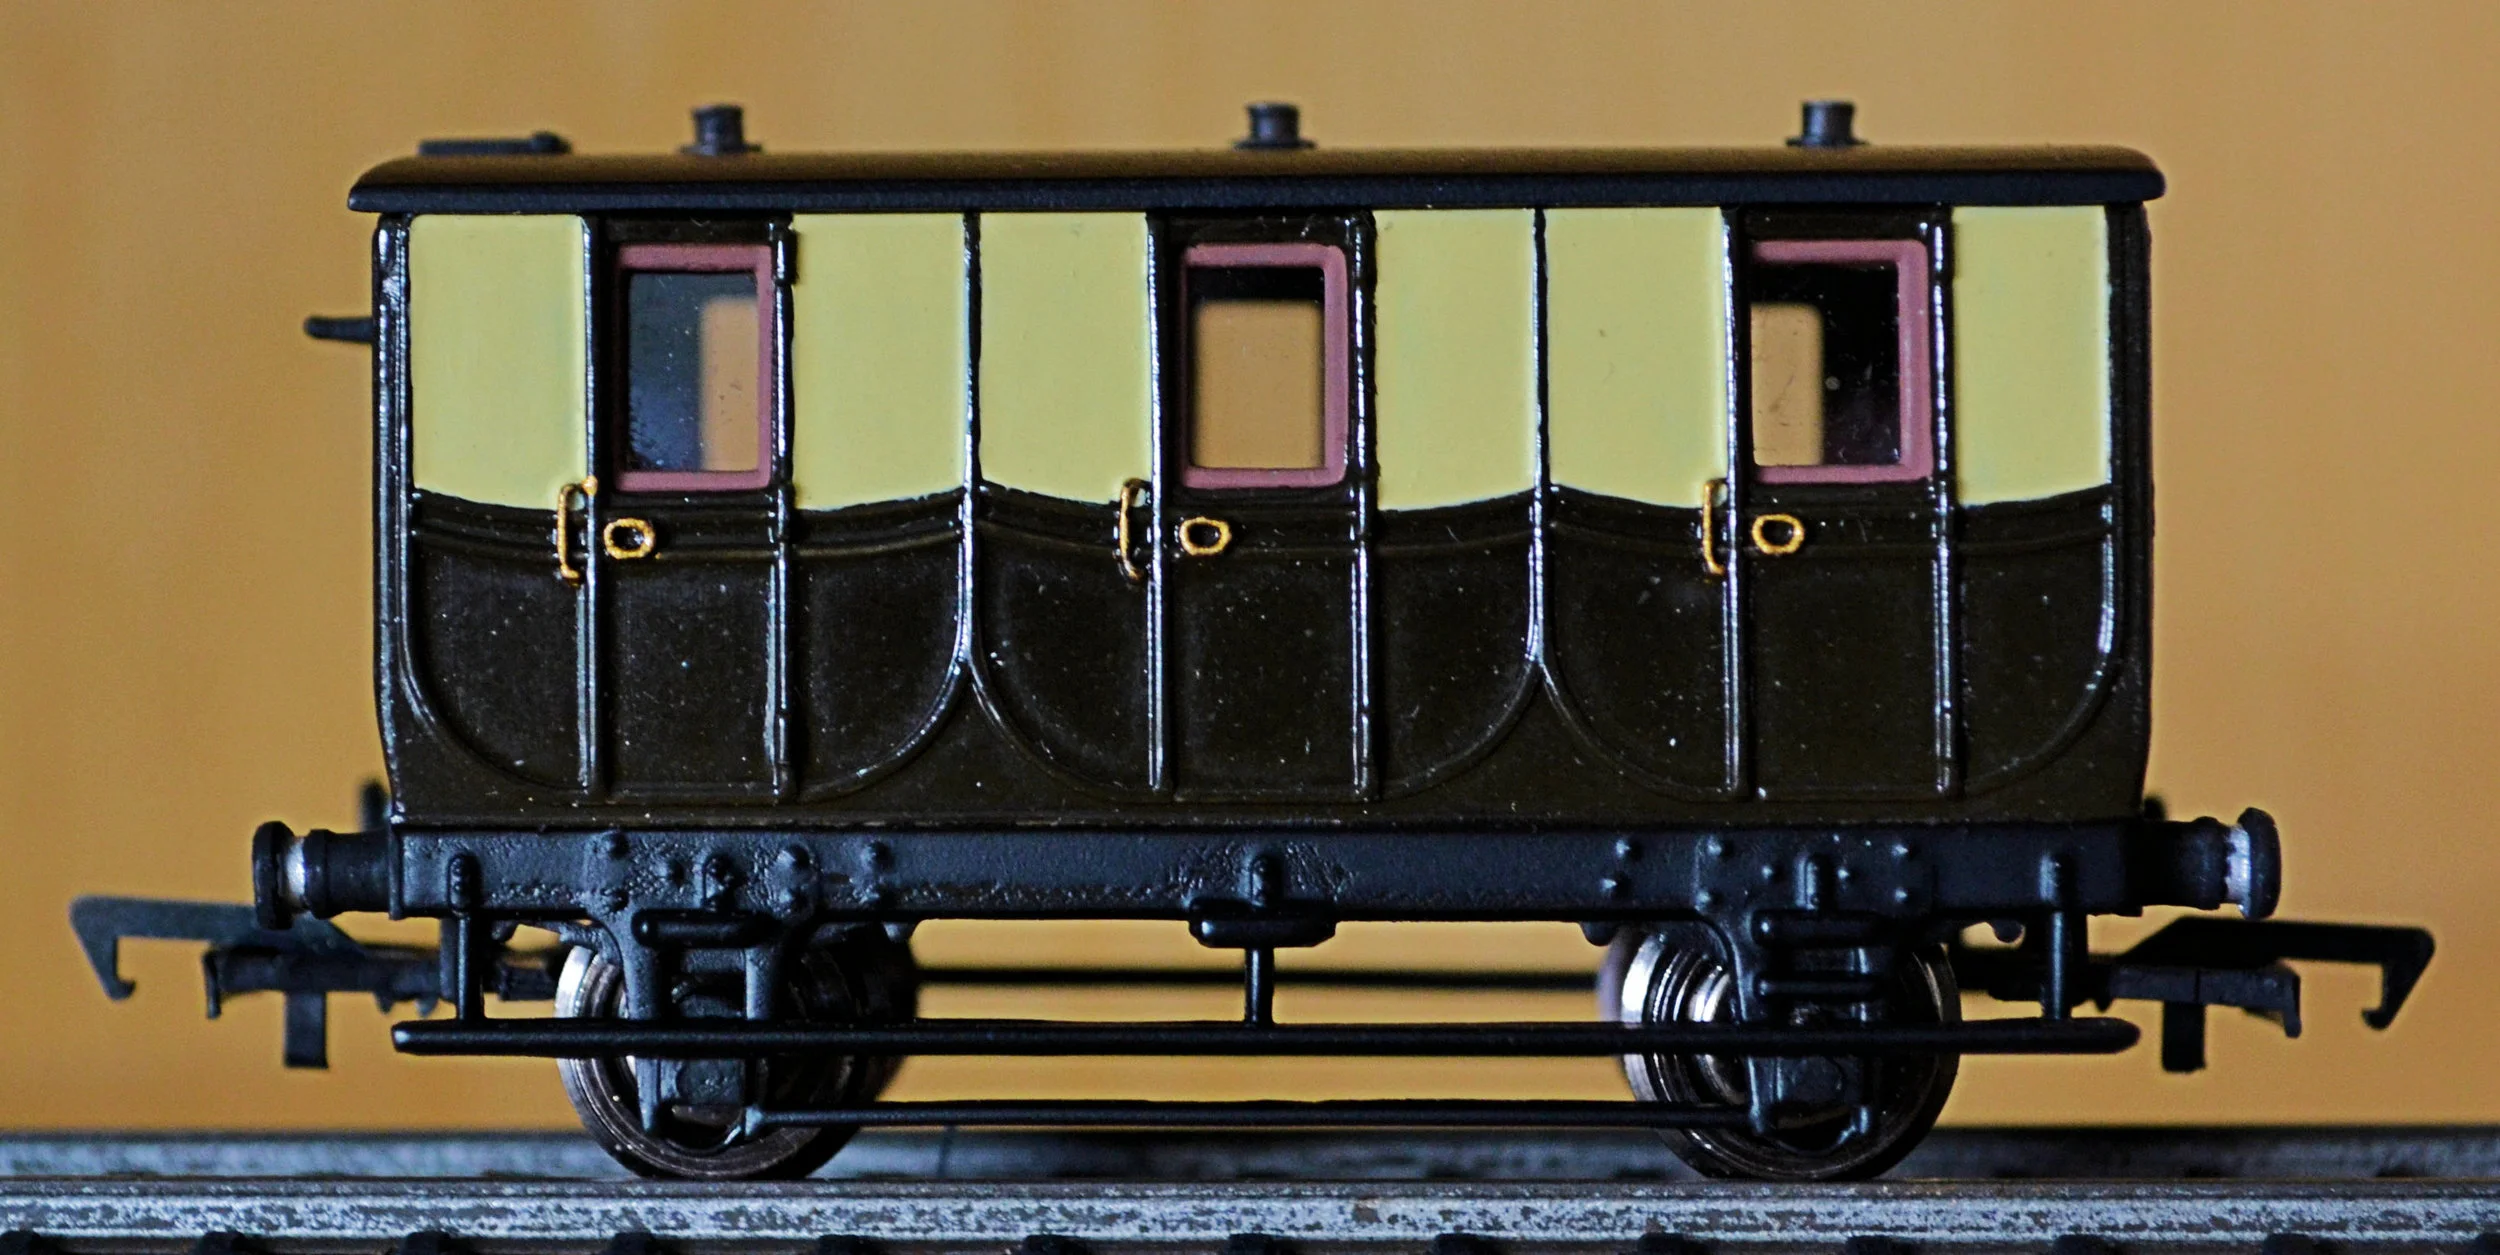
Since the above photos were taken I have replaced the wheels on this coach, substituting the wagon disks more prototypical split-spoke wheels [rather larger Hornby 12.6mm units]. The improvement in appearance justifies the additional outlay and the coach's buffer height now matches exactly that of the 4-wheel Brake built to accompany it [see Recent Kit-Builds elsewhere on this workbench].
Photographs of the second build will be posted in due course.